- Add an Extra Field for a Schema Type
- Enable/Disable Schema Markup
- Add Ratings Using Shortcode
- Disable a Specific Schema Markup
- Add Schema Markup on Subcategories
- Disable the White Label Settings
- Disable Corporate Contact Schema
- Remove Home List Item from Breadcrumblist Schema
- Remove Shop Item Link on Product Page
- Test a Schema Snippet
- Mapping Your Schema Fields
- Add an Extra Field for a Schema Type
- How to Use the Schema Pro plugin?
- All-in-one Schema Pro plugin
- Map Required fields with Custom Fields
- Create a Custom Fields
- Target Specific Areas of the Website
- Enable/Disable Schema Markup
- Add Ratings Using Shortcode
- Implement Breadcrumbs
- Disable Schema Markup on AMP Pages/Posts
- Plugin Settings for Schema Pro
- Restrict Schema Pro Settings for Specific User Roles
- Remove Home List Item from Breadcrumblist Schema
- How to Delete Schema Data?
- Regenerate Schema
- Configure Schema on a Single Page/Post
- Skip Rendering Invalid Schema
- Handle Errors & Warnings in a Testing Tool
- Configure WooCommerce
- Repeater Fields Controls on Pages/Posts
- WooCommerce Review Field Schema Markup
- Custom Schema Markup
- Compatibility with External plugins
- Rollback Schema Pro Plugin to Previous Version
- How to White Label Schema Pro
- Important Update: Sitelinks Search Box Deprecation
- Knowledge Graph with Schema Pro
- Configuring WooCommerce with Schema Pro Plugin
- How to Add a Schema markup for an Article on your website?
- What is the Difference between the Free and Pro Plugin?
- How to map fields with custom fields from third party plugins?
- Accept User Ratings from Users
- Update Schema Pro
- Register Your Copy of Schema Pro
- Organization Type in the Setup Wizard
- Schema Pro Setup Wizard
- Getting Started With Schema Pro
- How To Install Schema Pro Plugin
- Schema Markup for an Event page
- Schema Markup for a Review page
- Schema Markup for a Local Business Page
- Schema Markup for a Service Page
- Schema Markup for a Product Page
- Schema Markup for a Course page
- Schema Markup for a Recipe Page
- Schema Markup for a Person/ About Page
- Schema Markup for a Job Posting Page
- Schema Markup for a Video Object
How to Use the Schema Pro plugin?
Schema Pro plugin provides you an interface to implement schema on your web pages.
Once you purchase the plugin, you can download and install it like any other plugin.
After activation, Schema Pro and then the Schema tab in the plugin interface.
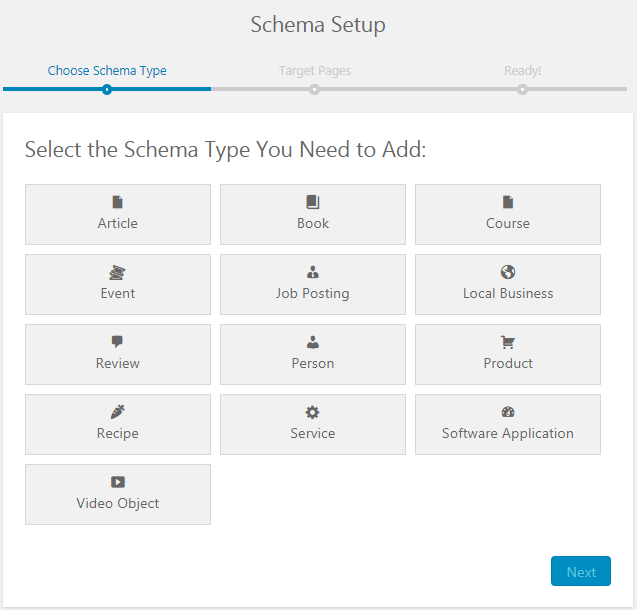
You can click on the Add New button to create a new Schema. This will prompt you to select the schema type you wish to create.

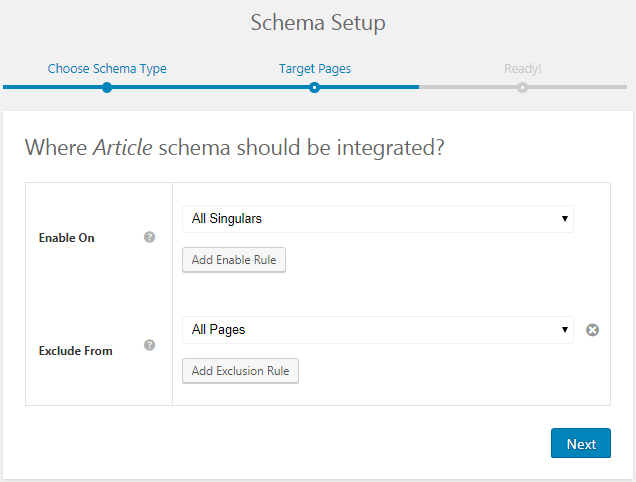
You will then be taken to the next step where you need to select the targeted pages/posts for the schema.
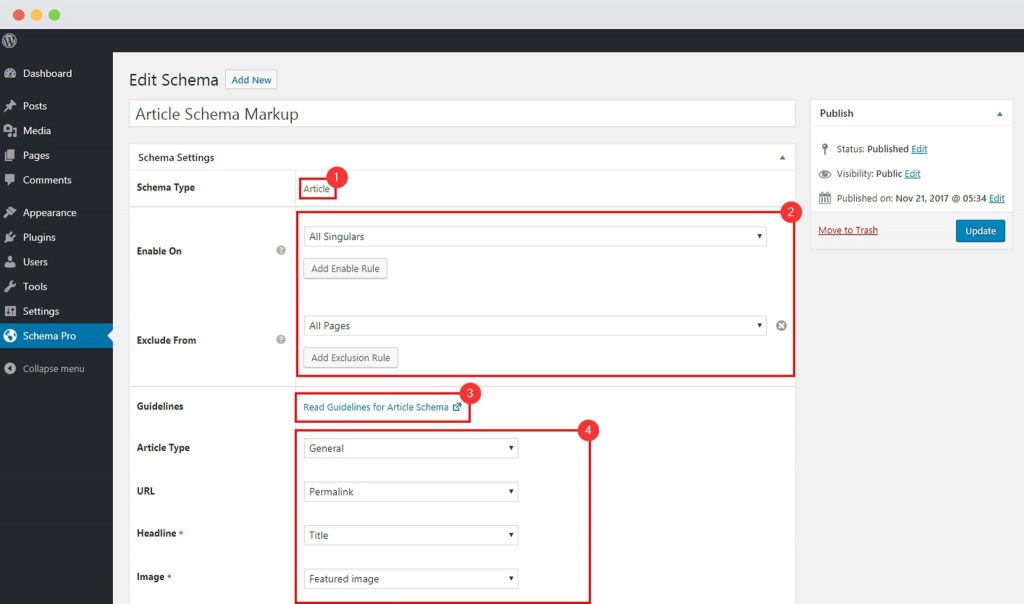
Click on the complete setup button. You are then taken to the post edit page where you can see the details of the schema you just created. Here, you can map the required fields, cross check details and more.
How it Looks:

As seen in the screenshot above, there is a Meta box Schema Settings. This is where you’ll find 4 different areas of settings.
- Schema Type: This option is used to select a schema type, like Article, Event etc. All schema types are listed in the dropdown menu.
- Enable On: This option is used to set the enable on rules for current schema. You can select the pages/posts you wish to show it for or the ones you wish to exclude.
- Guideline: Google has set a few guidelines for every schema type. We have added this link here, so that you can refer to these guidelines before you proceed publishing the schema.
- Schema Fields: This is where you’ll find all required and recommended fields for the current schema type. Fields are dependent on Schema type. All fields can be mapped with Global/Post meta/Custom options. You can refer to the article that will explain you how you can map schema fields.
We don't respond to the article feedback, we use it to improve our support content.

