- Add an Extra Field for a Schema Type
- Enable/Disable Schema Markup
- Add Ratings Using Shortcode
- Disable a Specific Schema Markup
- Add Schema Markup on Subcategories
- Disable the White Label Settings
- Disable Corporate Contact Schema
- Remove Home List Item from Breadcrumblist Schema
- Remove Shop Item Link on Product Page
- Test a Schema Snippet
- Mapping Your Schema Fields
- Add an Extra Field for a Schema Type
- How to Use the Schema Pro plugin?
- All-in-one Schema Pro plugin
- Map Required fields with Custom Fields
- Create a Custom Fields
- Target Specific Areas of the Website
- Enable/Disable Schema Markup
- Add Ratings Using Shortcode
- Implement Breadcrumbs
- Disable Schema Markup on AMP Pages/Posts
- Plugin Settings for Schema Pro
- Restrict Schema Pro Settings for Specific User Roles
- Remove Home List Item from Breadcrumblist Schema
- Delete Your Schema Data
- Regenerate Schema
- Configure Schema on a Single Page/Post
- Skip Rendering Invalid Schema
- Handle Errors & Warnings in a Testing Tool
- Configure WooCommerce
- Repeater Fields Controls on Pages/Posts
- WooCommerce Review Field Schema Markup
- Custom Schema Markup
- Compatibility with External plugins
- Rollback Schema Pro Plugin to Previous Version
- How to White Label Schema Pro
- Important Update: Sitelinks Search Box Deprecation
- Knowledge Graph with Schema Pro
- Configuring WooCommerce with Schema Pro Plugin
- How to Add a Schema markup for an Article on your website?
- Difference Between the Free and Pro Plugin?
- How to map fields with custom fields from third party plugins?
- Accept User Ratings from Users
- Update Schema Pro
- Register Your Copy of Schema Pro
- Organization Type in the Setup Wizard
- Schema Pro Setup Wizard
- Getting Started With Schema Pro
- How To Install Schema Pro Plugin
- Schema Markup for an Event page
- Schema Markup for a Review page
- Schema Markup for a Local Business Page
- Schema Markup for a Service Page
- Schema Markup for a Product Page
- Schema Markup for a Course page
- Schema Markup for a Recipe Page
- Schema Markup for a Person/ About Page
- Schema Markup for a Job Posting Page
- Schema Markup for a Video Object
Configure Schema on a Single Page/Post
With Schema Pro version 2.0 you get page-level controls to configure schema.
In this article, we will see details about it.
What does this feature mean?
Page-level controls for schema configuration means – the schema you apply from Settings > Schema Pro > Schemas will also be available on selected pages and posts. You can edit these values and modify them for a particular page/post.
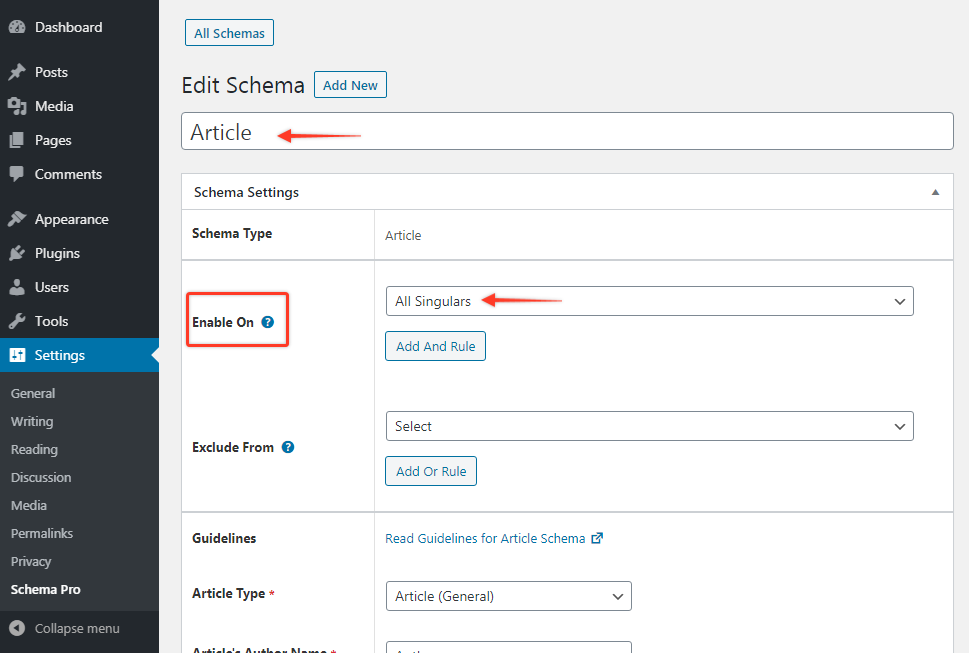
For example – If you create Article schema and enable it on all singulars, it will be available on all individual pages/posts.
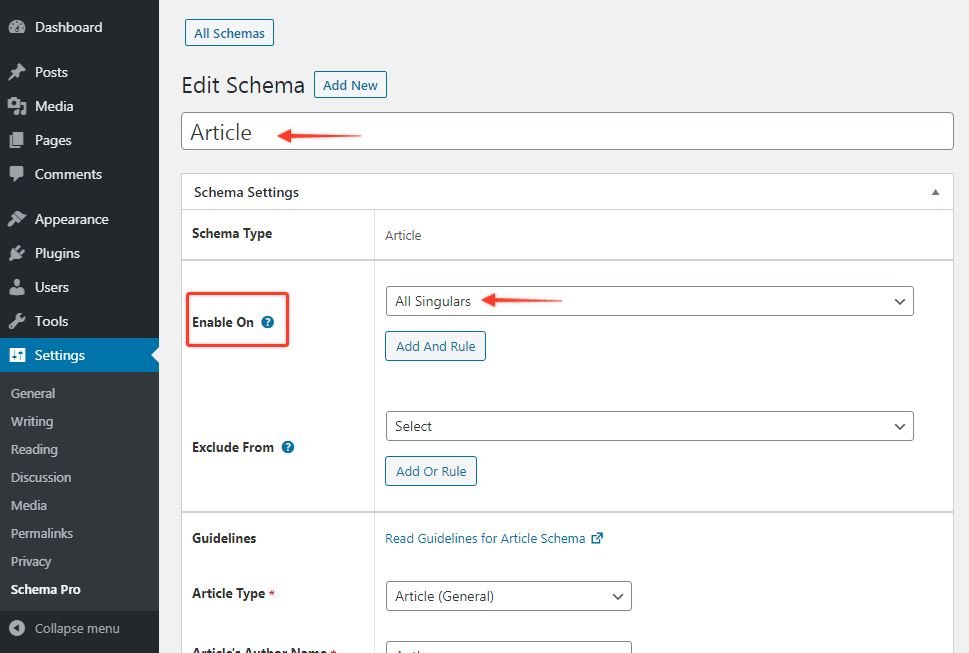
So when you visit a single page/post you can see all Article schema fields.
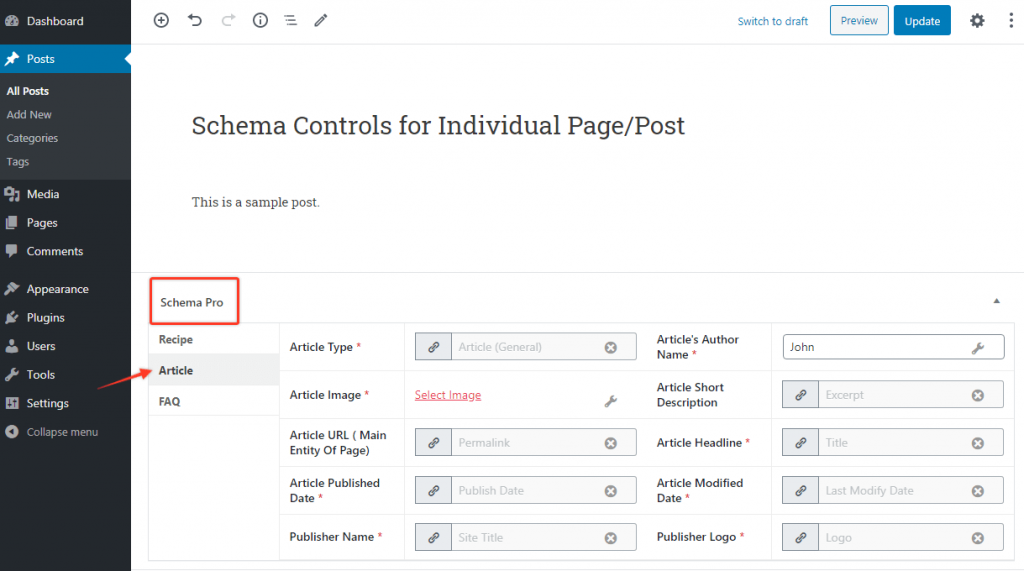
If you have applied more than one schema on a page, all of it will be available as shown in above image.
When this can be used?
This is useful when you wish to change the schema for a particular page/post. With this, you will not need to edit schema under Settings > Schema Pro or create a new schema with different configurations.
This saves your repetitive task to create and maintain new schema.
How to use this?
1. You must have created schemas under Settings > Schema Pro > Schemas.
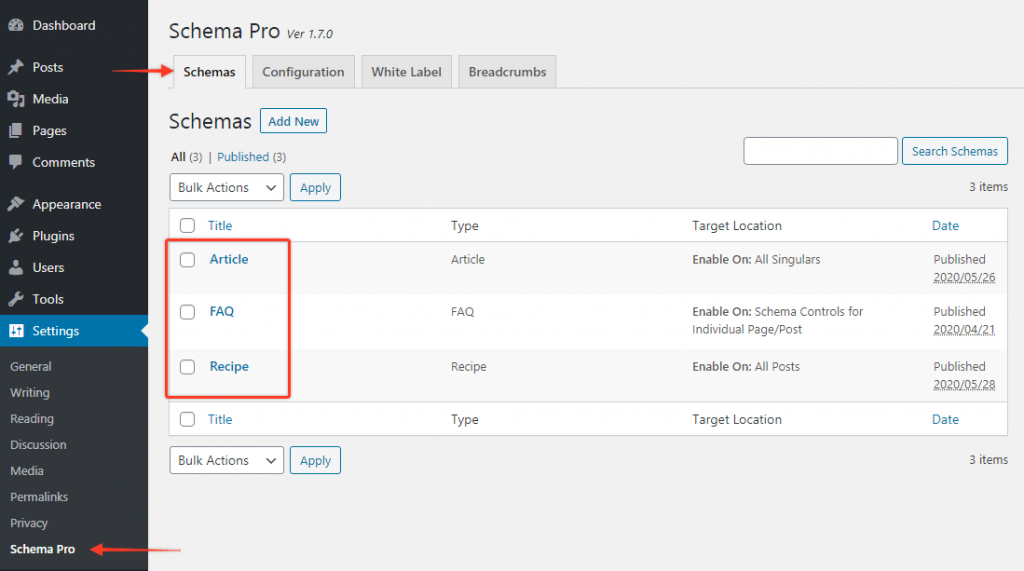
2. Make sure you have enabled it on pages/posts.
3. Now edit the required page/post and scroll down to the bottom. Applied schemas will be available here.
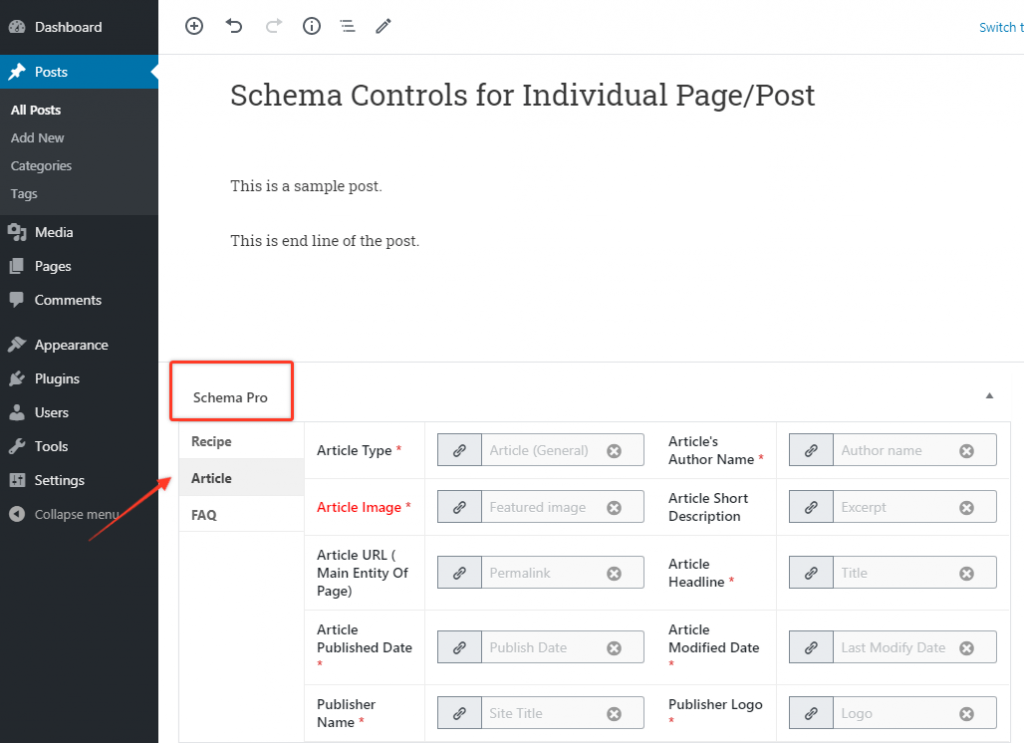
4. Edit/update the values you need and save changes.
Note: By default all fields will fetch values from schema under Settings > Schema Pro. You can change this and choose another values from the list or set manual values.
5. You might see some of the fields marked in red color. These are required fields in the schema that do not have any value. Skipping these fields will add invalid schema markup to the code.
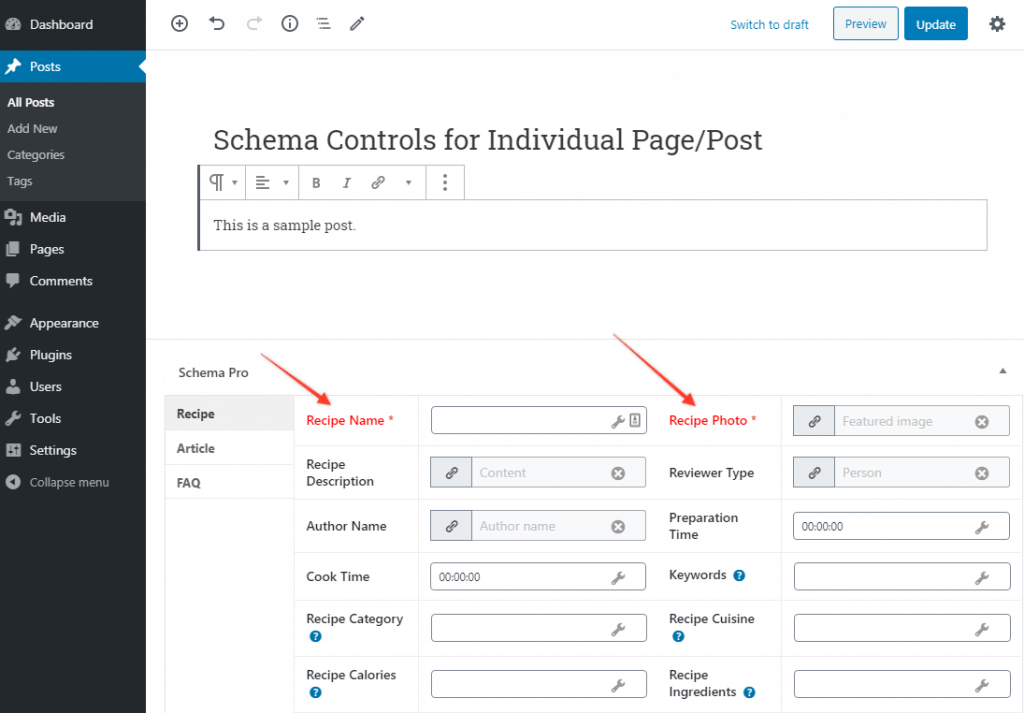
If you don’t wish to fill these fields you can skip them from rendering. Option to do so is available under Settings > Schema Pro > Configuration > Advanced Settings > Skip Rendering Invalid Schema.
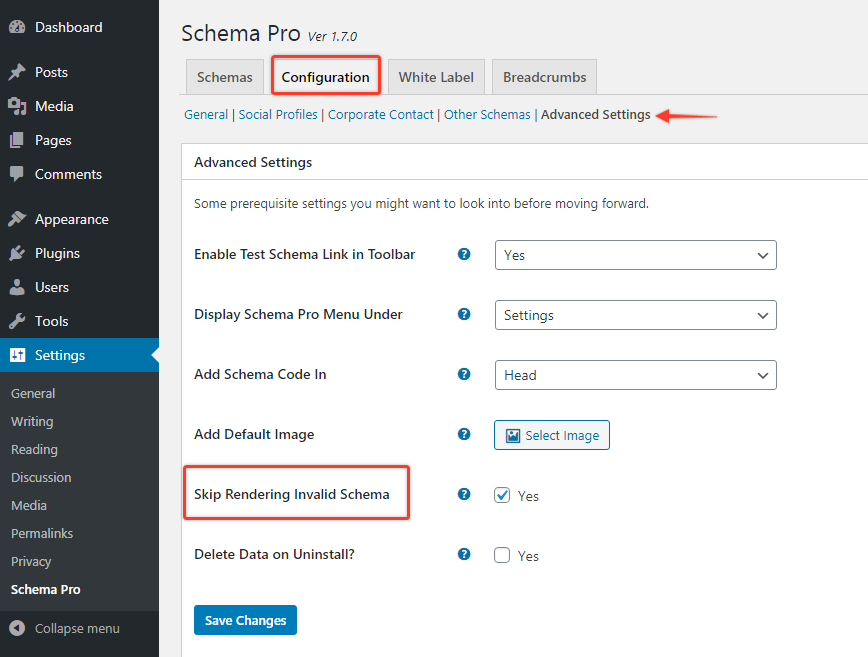
Read more about this option here.
We don't respond to the article feedback, we use it to improve our support content.