- Add an Extra Field for a Schema Type
- Enable/Disable Schema Markup
- Add Ratings Using Shortcode
- Disable a Specific Schema Markup
- Add Schema Markup on Subcategories
- Disable the White Label Settings
- Disable Corporate Contact Schema
- Remove Home List Item from Breadcrumblist Schema
- Remove Shop Item Link on Product Page
- Test a Schema Snippet
- Mapping Your Schema Fields
- Add an Extra Field for a Schema Type
- How to Use the Schema Pro plugin?
- All-in-one Schema Pro plugin
- Map Required fields with Custom Fields
- Create a Custom Fields
- Target Specific Areas of the Website
- Enable/Disable Schema Markup
- Add Ratings Using Shortcode
- How to Add a Schema markup for an Article on your website?
- Difference Between the Free and Pro Plugin?
- How to map fields with custom fields from third party plugins?
- Accept User Ratings from Users
- Update Schema Pro
- Register Your Copy of Schema Pro
- Organization Type in the Setup Wizard
- Schema Pro Setup Wizard
- Getting Started With Schema Pro
- How To Install Schema Pro Plugin
- Schema Markup for an Event page
- Schema Markup for a Review page
- Schema Markup for a Local Business Page
- Schema Markup for a Service Page
- Schema Markup for a Product Page
- Schema Markup for a Course page
- Schema Markup for a Recipe Page
- Schema Markup for a Person/ About Page
- Schema Markup for a Job Posting Page
- Schema Markup for a Video Object
- Corporate Contact Markup
- Schema Markup for Book Page
- Schema Markup for Software Application Page
- Schema Markup for a FAQ Page
- Schema Markup for a How-To Page
- Schema Markup for Article Page
- FAQ Schema Type & FAQ Schema Pro Block
- FAQ Schema Pro Block for Gutenberg
- Schema Markup for a Vehicle Listing Page
- Schema Markup for a Podcast Listing Page
- Schema Markup for a Movie Carousel Page
Schema Markup for a Review page
Having reviews for your products not only gives you an insight into how your customers find your products and services but can also boost your search engine ranks by displaying these on the search results page.
Not only does it boost your website’s SEO, but it also gives you more exposure to those searching for you or your business or products. The best way to do that is by adding schema markup by Schema Pro.

The Schema Pro plugin adds a review schema markup to page/post.
Let’s see how to add review page schema with easy steps –
How to Add the Review Schema Markup?
Step 1. Create a new Schema markup by going to the Schema Pro option under WordPress Dashboard > Settings > Schema Pro. Click on “Add New”.
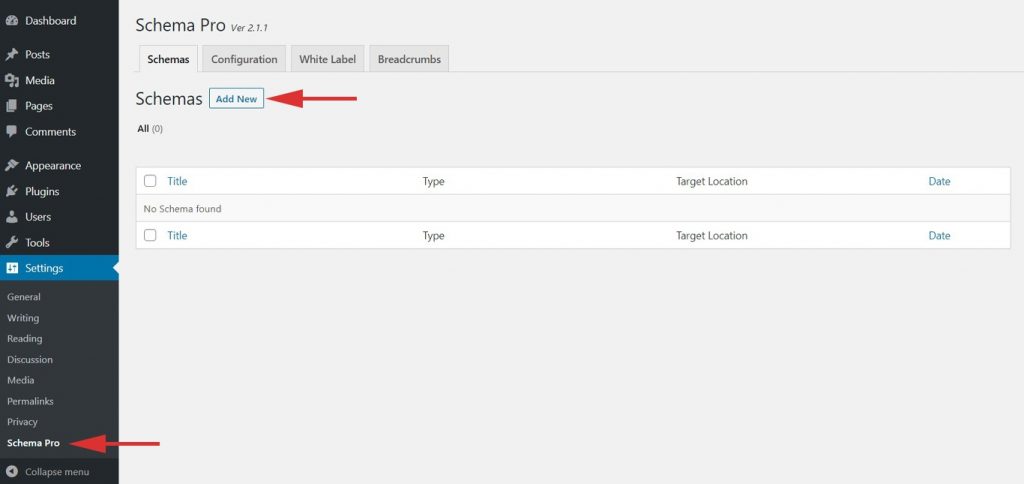
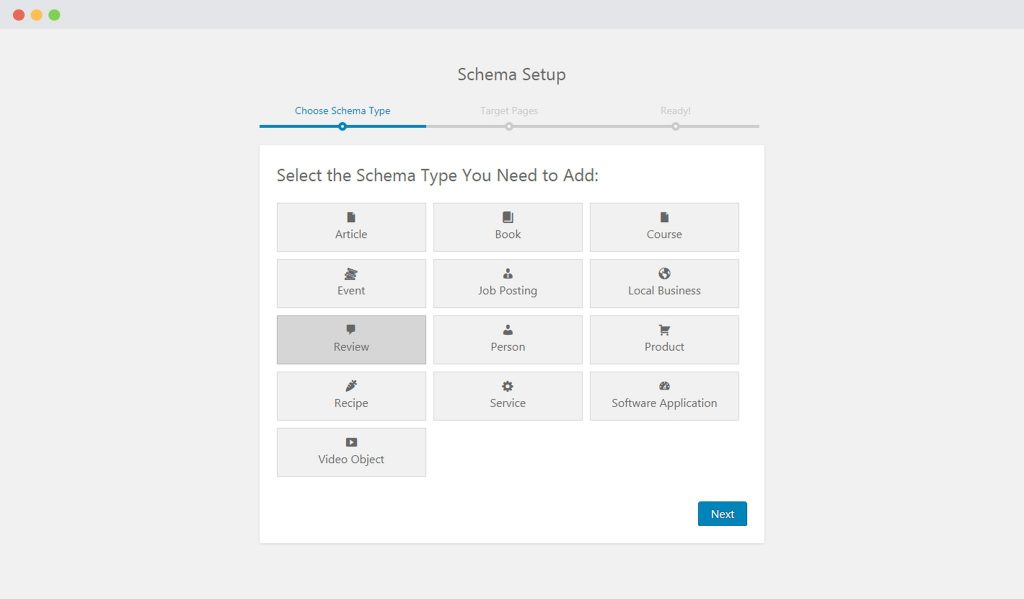
Step 2. Select the type of schema as “Review”.
Step 3. Select the pages/posts that you want to apply this markup to. You can add display rules and also exclude pages and posts you want to exempt this schema from.
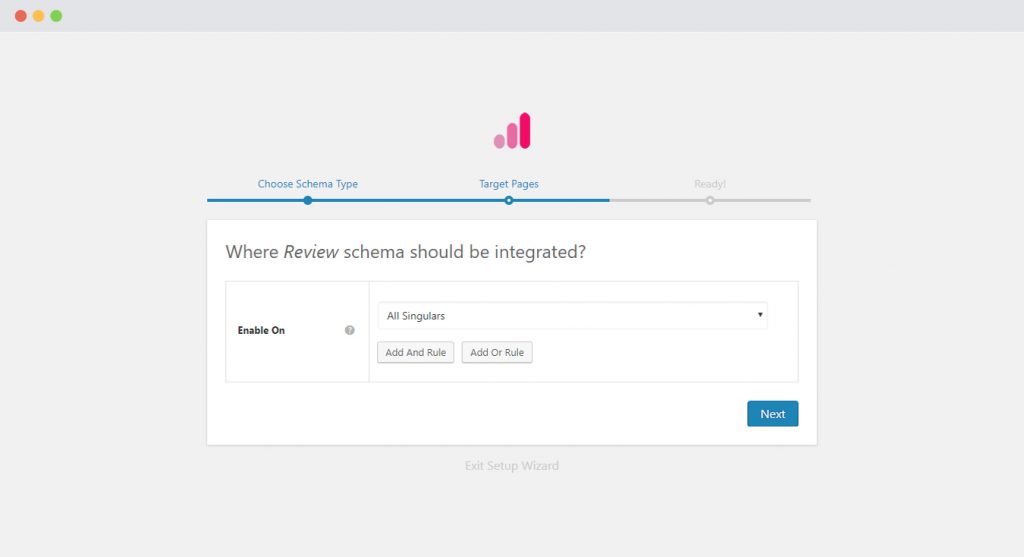
If you want to know more about how you can target specific pages and posts, check out our article on it.
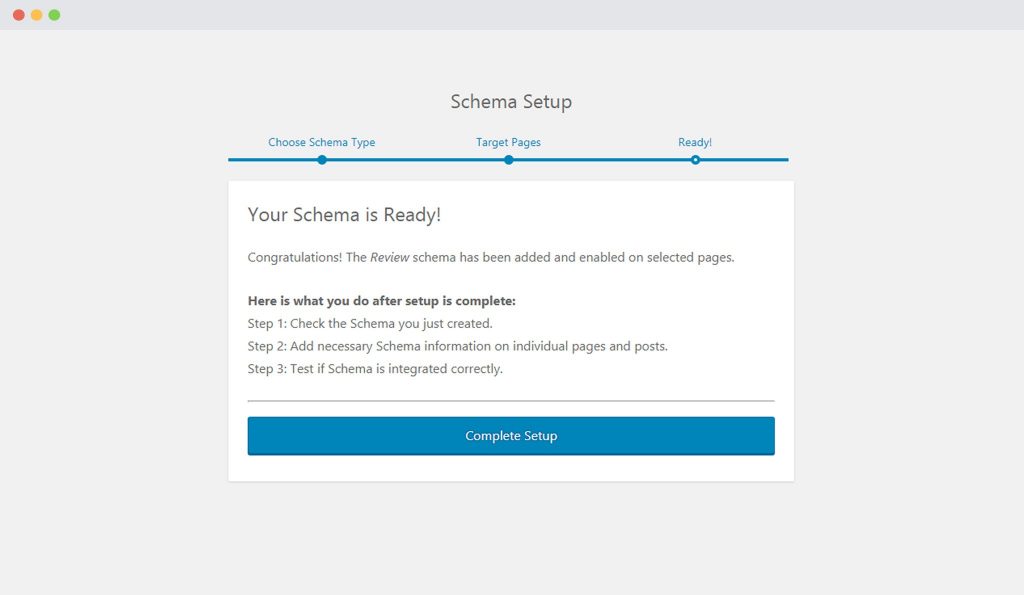
Step 4. You can then complete the setup. From here you will be taken to fill the required properties of the schema.
Step 5: In Schema Settings, you will see various fields related to the review schema. These fields help you enter details about your reviews. We recommend you make sure that all schema fields are put on the right values.
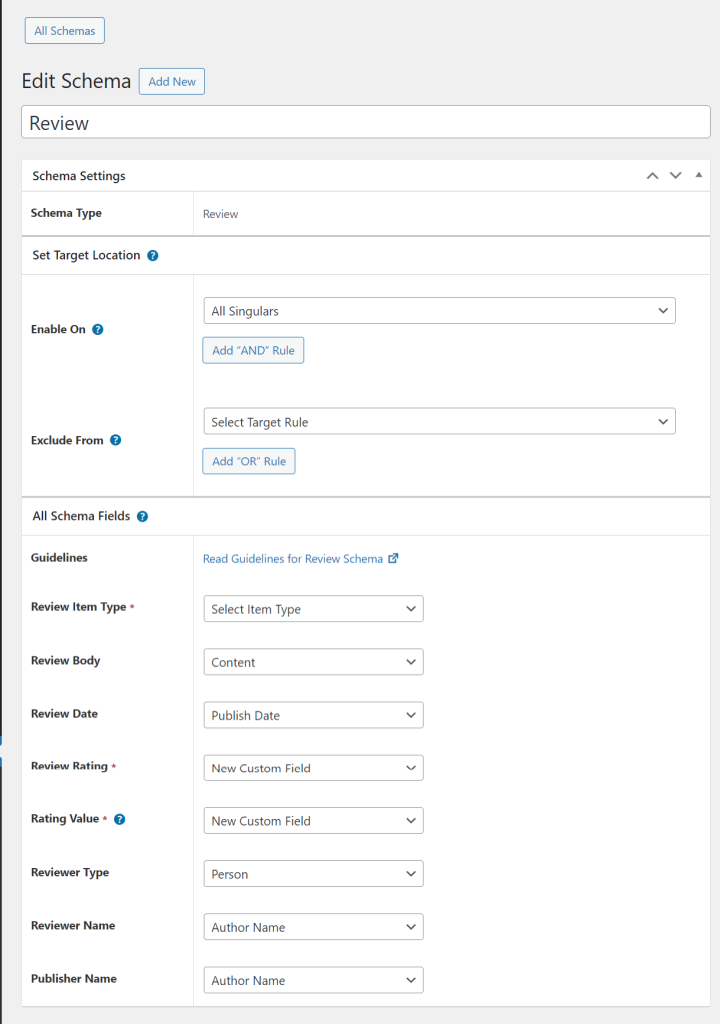
Check out the next section to understand all available fields in the review schema markup.
What Do These Fields Mean?
Let’s dive into what all the review schema fields mean so that you can fill in the correct values.
In the following table –
– Asterisk sign (*) indicates required fields.
These fields are required by Google and if not filled out will result in an error on the Rich Snippets Test.
– Caret sign (^) indicates the recommended fields.
These fields are recommended to ensure maximum utilization of the SEO benefits of Schema Pro and will increase your chances of displaying Rich Snippets.
| Fields | What They Mean |
| Review Item Type* | The type of item being reviewed. Once you select the type additional fields will display. |
| Review Body* | The actual review. |
| Review Date* | Date when the review was posted. |
| Review Rating^ | The ratings that the user has given. |
| Rating Value* | A numerical quality rating for the item, either a number, fraction, or percentage |
| Reviewer Type^ | This field tells whether a review given by a person or organization. |
| Reviewer Name^ | The name of the user who posted this review. |
| Publisher Name^ | Name of the publisher or reviewer. |
Not sure how you can map these fields? You can refer to this article that gives you a clear picture of the fields you see in the drop-down menu.
You can display rating anywhere on page with shortcode. .
Configure Schema on a Single Page/Post
Once you fill the above schema fields, the values will be applied to all target locations. These values are common for all target locations.
But in case you wish to alter these values for a particular page/post, you can also find all the schema fields on each of the targeted pages/posts.
If you visit a single page/post you can see all review schema fields at the bottom.
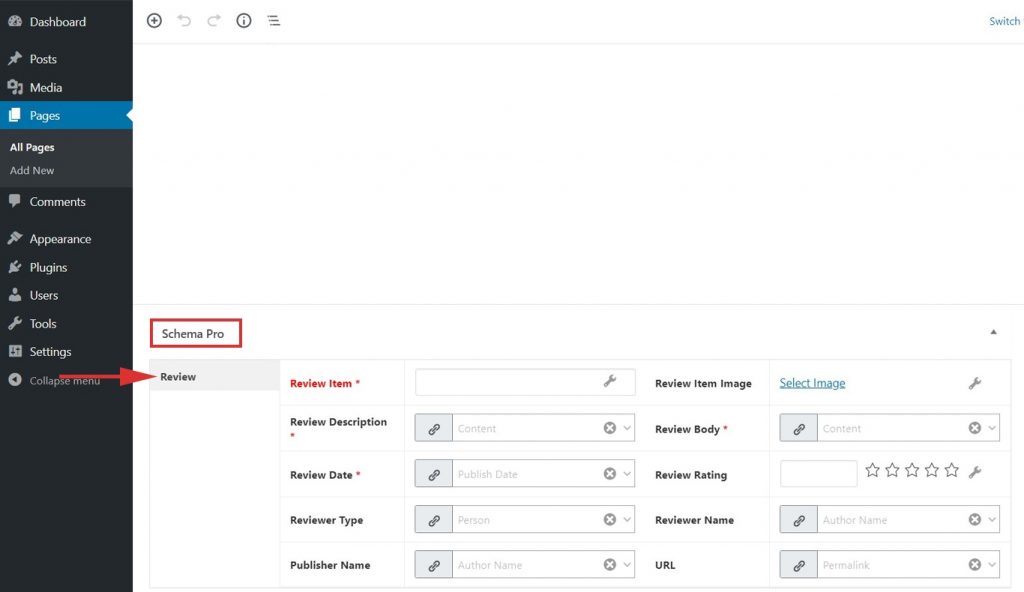
By default, all fields will fetch values from schema under Settings > Schema Pro > review but you can also change this and choose other values from the list or set the values manually.
You might see some of the fields marked in red, these are required fields in the schema that do not have any value. Skipping these fields will add invalid schema markup to the code.Read this article here to learn more about the page-level schema configuration.
Test Your Schema
Once you are done with adding schema markup, test it to see if it sets well.
Testing can be done with just a single click with the “Test Schema” button on the admin bar. Here is an article that will show you how you can test your schema.
OR
You can manually visit the Google testing tool and insert your content.
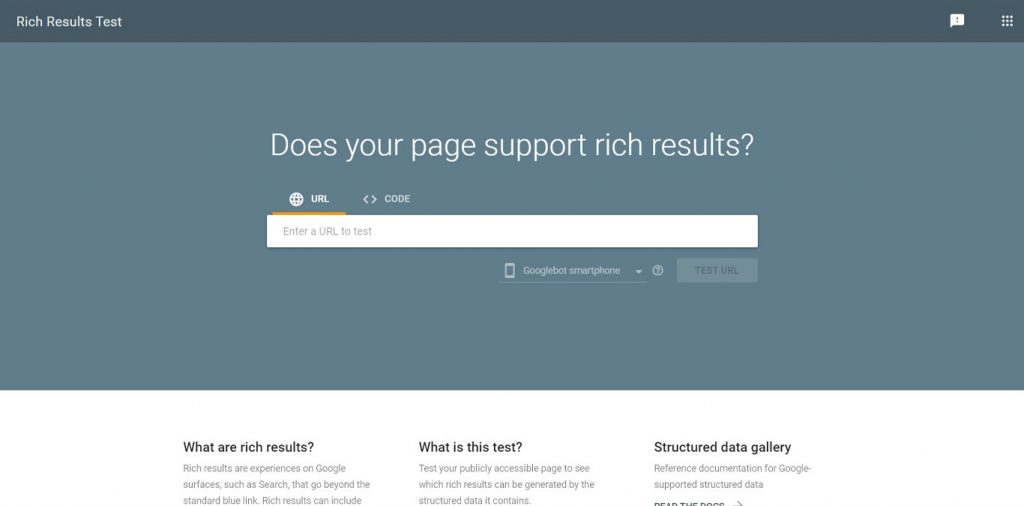
Once you’re done, you’re all set to see your business or products attracting more visitors through the search engine’s rich snippets of your reviews!
How to Handle Errors & Warnings in a Testing Tool?
When you test your page/post with Google testing tool you might see some errors and warnings come up. Refer the article to see detailed steps to easily fix errors and warnings.
Setting up other schema types? Check them out below.
We don't respond to the article feedback, we use it to improve our support content.