- Add an Extra Field for a Schema Type
- Enable/Disable Schema Markup
- Add Ratings Using Shortcode
- Disable a Specific Schema Markup
- Add Schema Markup on Subcategories
- Disable the White Label Settings
- Disable Corporate Contact Schema
- Remove Home List Item from Breadcrumblist Schema
- Remove Shop Item Link on Product Page
- Test a Schema Snippet
- Mapping Your Schema Fields
- Add an Extra Field for a Schema Type
- How to Use the Schema Pro plugin?
- All-in-one Schema Pro plugin
- Map Required fields with Custom Fields
- Create a Custom Fields
- Target Specific Areas of the Website
- Enable/Disable Schema Markup
- Add Ratings Using Shortcode
- How to Add a Schema markup for an Article on your website?
- Difference Between the Free and Pro Plugin?
- How to map fields with custom fields from third party plugins?
- Accept User Ratings from Users
- Update Schema Pro
- Register Your Copy of Schema Pro
- Organization Type in the Setup Wizard
- Schema Pro Setup Wizard
- Getting Started With Schema Pro
- How To Install Schema Pro Plugin
- Schema Markup for an Event page
- Schema Markup for a Review page
- Schema Markup for a Local Business Page
- Schema Markup for a Service Page
- Schema Markup for a Product Page
- Schema Markup for a Course page
- Schema Markup for a Recipe Page
- Schema Markup for a Person/ About Page
- Schema Markup for a Job Posting Page
- Schema Markup for a Video Object
- Corporate Contact Markup
- Schema Markup for Book Page
- Schema Markup for Software Application Page
- Schema Markup for a FAQ Page
- Schema Markup for a How-To Page
- Schema Markup for Article Page
- FAQ Schema Type & FAQ Schema Pro Block
- FAQ Schema Pro Block for Gutenberg
- Schema Markup for a Vehicle Listing Page
- Schema Markup for a Podcast Listing Page
- Schema Markup for a Movie Carousel Page
Schema Markup for a Course page
With the advancement of technology, more and more institutions are bringing their lessons and classes online. That also includes professionals who just want to share their expertise with people who want to take their courses and earn some side income. If you’re one of these, adding schema markup to your course pages makes it easier for your course takers to find you and your online courses.

Not only does it boost your website’s SEO, but it also gives you more exposure to those searching for you or your courses. The best way to do that is by adding schema markup by Schema Pro.
The Schema Pro plugin adds a course schema markup to page/post.
Let’s see how to add a course schema with easy steps –
How to Add the Course Schema Markup?
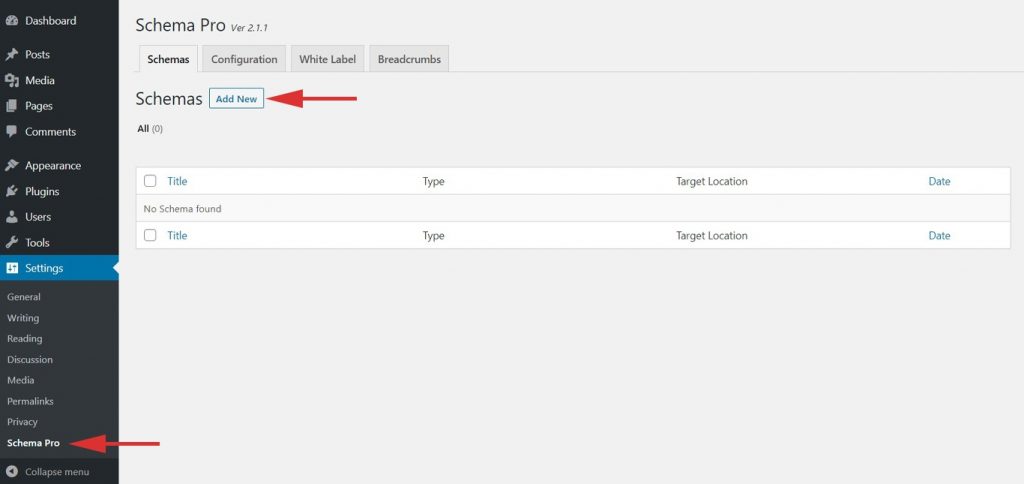
Step 1. Create a new Schema markup by going to the Schema Pro option under WordPress Dashboard > Settings > Schema Pro. Click on “Add New”
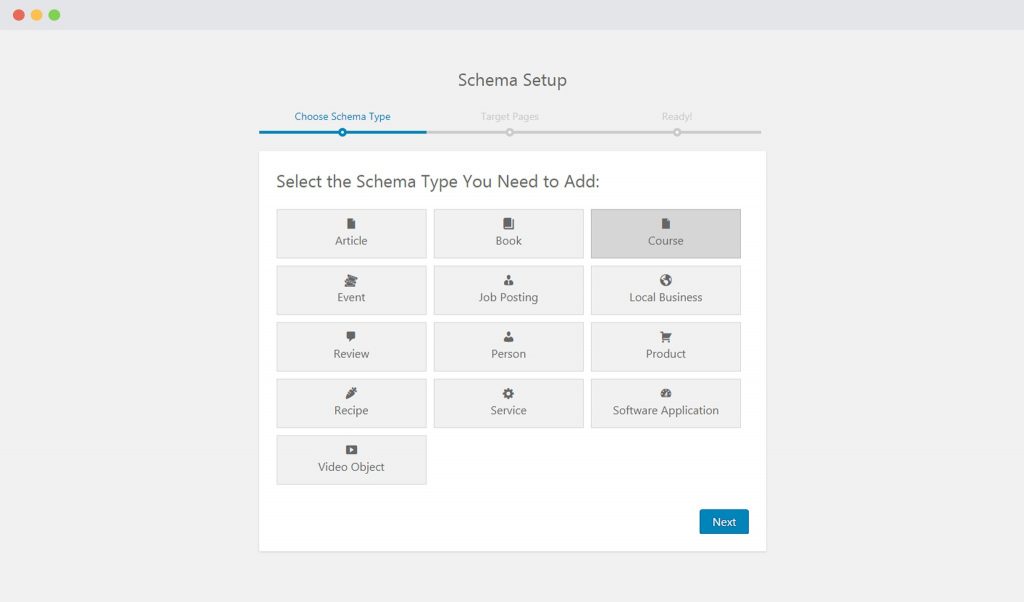
Step 2. Select the type of schema as “Course”.
Step 3. Select the pages/posts that you want to apply this markup to. You can add display rules and also exclude pages and posts you want to exempt this schema from.
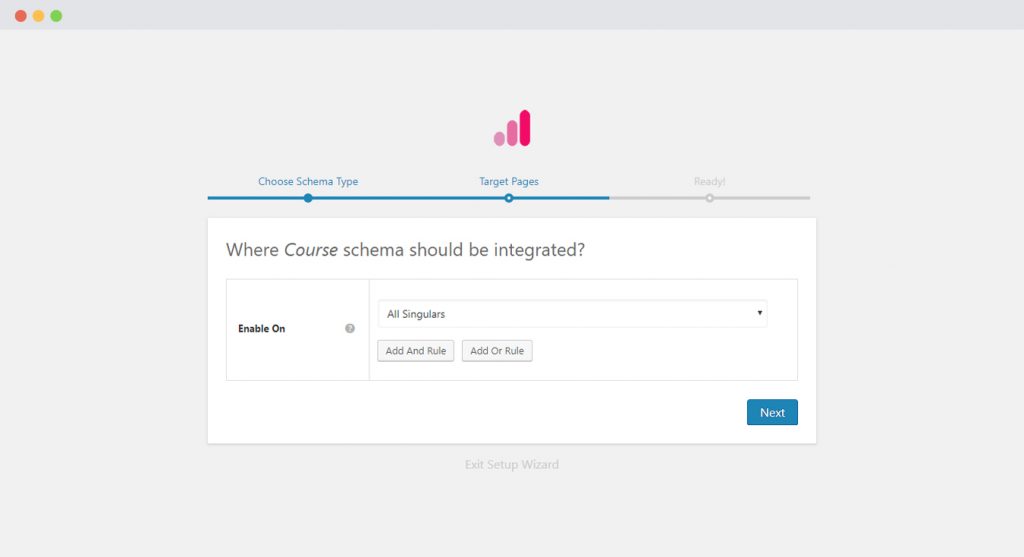
If you want to know more about how you can target specific pages and posts, check out our article on it.
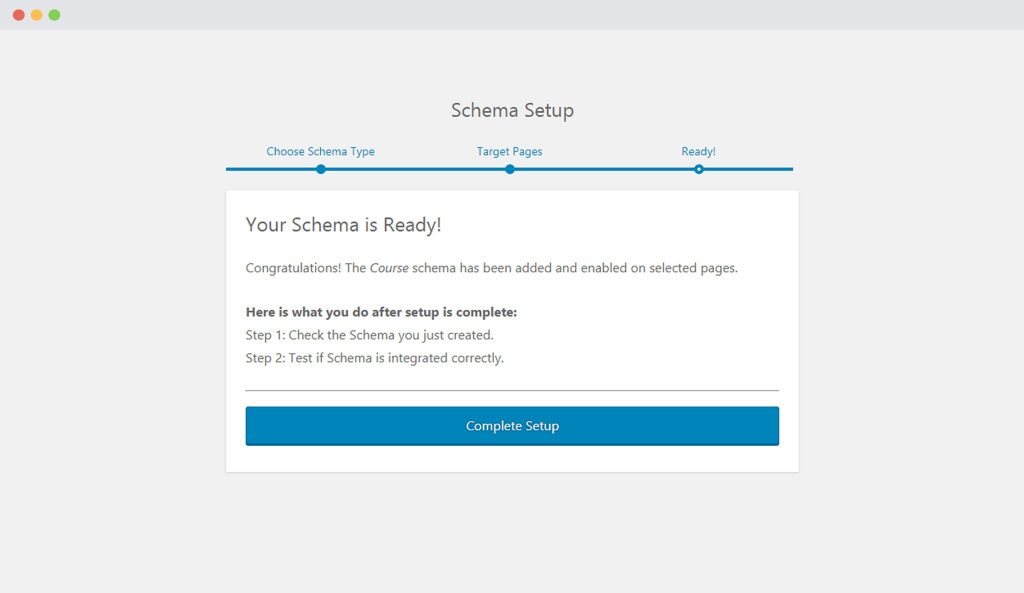
Step 4. You can then complete the setup. From here you will be taken to fill the required properties of the schema.
Step 5. In Schema Settings, you will see various fields related to course schema. These fields help you enter details about your course. We recommend you make sure that all schema fields are put on the right values.

Check out the next section to understand all available fields in the course schema markup.
What Do These Fields Mean?
Let’s dive into what all the course schema fields mean so that you can fill in the correct values.
In the following table –
– Asterisk sign (*) indicates required fields.
These fields are required by Google and if not filled out will result in an error on the Rich Snippets Test.
– Caret sign (^) indicates the recommended fields.
These fields are recommended to ensure maximum utilization of the SEO benefits of Schema Pro and will increase your chances of displaying Rich Snippets.
| Fields | What They Mean |
| Course Title * | The name of the course you are offering. |
| Description * | A short description or summary to tell what the course is all about. |
| Course Code ^ | The identifiers for the code used by the Course Provider.Good Examples:CS6016.001 |
| Course Provider ^ | The organization that publishes the source of the course. Good Examples: – UC – Berkely – Oxford |
| Offers * | The pricing and availability of the course |
| Offer Category* | Enter the pricing category of the course. |
| Price Currency* | Enter the currency for the course in ISO 8601 format |
| Price* | Enter the price for the course. |
| Course Instance ^ | An offering of the course at a specific time and place or through specific media or mode of study or to a specific section of students. |
| Instance Name * | This will be the name of the instance you are offering. |
| Instance Description * | This is a short description of the course. The best practice is to fetch part of the page/post content or the excerpt of the page/post. |
| Course Mode ^ | The medium or means of delivery of the course instance or the mode of study. Good Examples: – Online – On-Site – Full-time – Part-time |
| Image ^ | The course featured images. |
| Course Status ^ | This can be a related image of a photo you wish to add to the snippet. It could be a featured image of a custom image. |
| Course Attendance Mode ^ | The location of the Course Instance. There are different requirements depending on if the Course is happening online or at a physical location. |
| Start Date * | You can add the value for the date here. |
| End Date ^ | The last date of the course. |
| Repeat Count* | Enter how long the course lasts in repeat frequency units. |
| Repeat Frequency* | Choose the repeat frequency unit – Daily, Weekly, Monthly, or Yearly. |
| Course Workload* | Specify how long it will take to watch all the videos in your course and complete the required assignments/exams. The time is represented in ISO8601 format, such as PT22H, P1M, and so on. |
| Course Previous Start Date ^ | |
| Online Course URL^ | You can enter the course provider URL here. |
| Course Organizer Name ^ | The person or organization that is hosting the Course. |
| Course Organizer URL ^ | The URL fo the person or organization hosting the Course. |
| Location Name ^ | This is the venue for the course. This can be a custom field or a custom text in case of a fixed value. |
| Location Address * | This is part of the address of the venue. This can be a custom field or a custom text in case of a fixed value. |
| Price ^ | If you’re offering a special price, you can mention that here. |
| Currency ^ | The currency you’re accepting when selling the course. |
| Valid From ^ | This is the date from when the offer is made available. |
| Offer URL ^ | |
| Availability ^ | You can list down offers here. This is where you can mention early bird offers, etc. |
| Performer ^ | You can choose to use the author’s name, fetch a custom field value, or accept custom text. |
| A Reference Link | A reference page that unambiguously indicates the item’s identity; for example, the URL of the item’s Wikipedia page, Freebase page, or official website. |
| Rating | The course rating. |
| Review Count | In case you’re adding ratings with another plugin, fetch those ratings. Or Accept User Ratings on the page. This option will allow users to submit reviews from the targeted pages. |
Not sure how you can fill these fields? You can refer to this article that gives you a clear picture of the fields you see in the drop-down menu.
With Schema Pro you can also add extra or custom fields to your markup. Check out this article to find out how.
Configure Schema on a Single Page/Post
Once you fill the above schema fields, the values will be applied to all target locations. These values are common for all target locations.
But in case you wish to alter these values for a particular page/post, you can also find all the schema fields on each of the targeted pages/posts.
If you visit a single page/post you can see all course schema fields at the bottom.
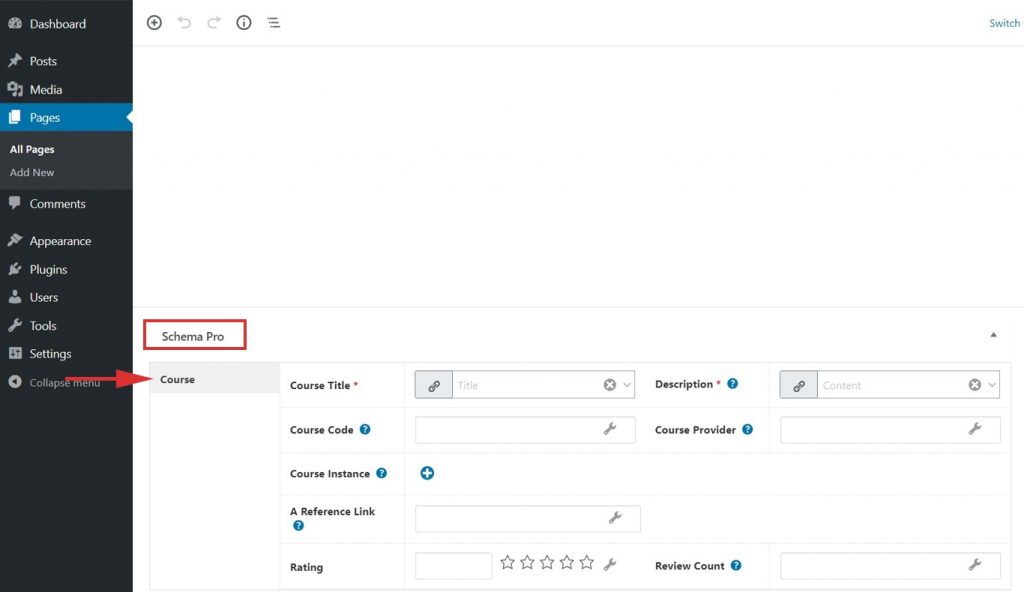
By default, all fields will fetch values from schema under Settings > Schema Pro > course but you can also change this and choose other values from the list or set the values manually.
You might see some of the fields marked in red, these are required fields in the schema that do not have any value. Skipping these fields will add invalid schema markup to the code.
Read this article here to learn more about the page-level schema configuration.
Test Your Schema
Once you are done with adding schema markup, test it to see if it sets well.
Testing can be done with just a single click with the “Test Schema” button on the admin bar. Here is an article that will show you how you can test your schema.
OR
You can manually visit the Rich Results Test tool and insert your content.
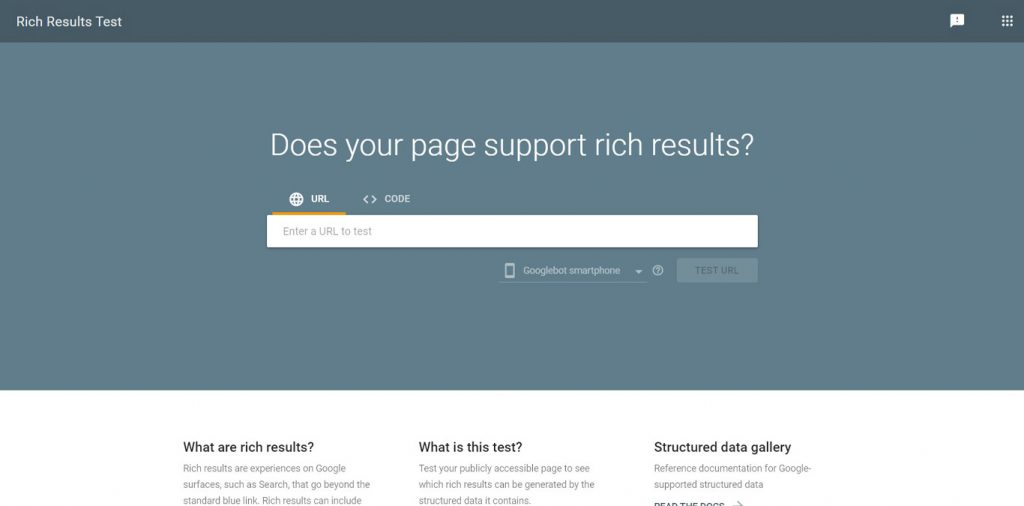
Once you’re done, you’re all set to see your courses attracting more applications through the search engine’s rich snippets!
How to Handle Errors & Warnings in a Testing Tool?
When you test your page/post with the Rich Results Test tool you might see some errors and warnings come up. Refer the article to see detailed steps to easily fix errors and warnings.
Setting up other schema types? Check them out below.
We don't respond to the article feedback, we use it to improve our support content.