- Add an Extra Field for a Schema Type
- Enable/Disable Schema Markup
- Add Ratings Using Shortcode
- Disable a Specific Schema Markup
- Add Schema Markup on Subcategories
- Disable the White Label Settings
- Disable Corporate Contact Schema
- Remove Home List Item from Breadcrumblist Schema
- Remove Shop Item Link on Product Page
- Test a Schema Snippet
- Mapping Your Schema Fields
- Add an Extra Field for a Schema Type
- How to Use the Schema Pro plugin?
- All-in-one Schema Pro plugin
- Map Required fields with Custom Fields
- Create a Custom Fields
- Target Specific Areas of the Website
- Enable/Disable Schema Markup
- Add Ratings Using Shortcode
- Implement Breadcrumbs
- Disable Schema Markup on AMP Pages/Posts
- Plugin Settings for Schema Pro
- Restrict Schema Pro Settings for Specific User Roles
- Remove Home List Item from Breadcrumblist Schema
- Delete Your Schema Data
- Regenerate Schema
- Configure Schema on a Single Page/Post
- Skip Rendering Invalid Schema
- Handle Errors & Warnings in a Testing Tool
- Configure WooCommerce
- Repeater Fields Controls on Pages/Posts
- WooCommerce Review Field Schema Markup
- Custom Schema Markup
- Compatibility with External plugins
- Rollback Schema Pro Plugin to Previous Version
- How to White Label Schema Pro
- Important Update: Sitelinks Search Box Deprecation
- Knowledge Graph with Schema Pro
- Configuring WooCommerce with Schema Pro Plugin
- How to Add a Schema markup for an Article on your website?
- Difference Between the Free and Pro Plugin?
- How to map fields with custom fields from third party plugins?
- Accept User Ratings from Users
- Update Schema Pro
- Register Your Copy of Schema Pro
- Organization Type in the Setup Wizard
- Schema Pro Setup Wizard
- Getting Started With Schema Pro
- How To Install Schema Pro Plugin
- Schema Markup for an Event page
- Schema Markup for a Review page
- Schema Markup for a Local Business Page
- Schema Markup for a Service Page
- Schema Markup for a Product Page
- Schema Markup for a Course page
- Schema Markup for a Recipe Page
- Schema Markup for a Person/ About Page
- Schema Markup for a Job Posting Page
- Schema Markup for a Video Object
Custom Schema Markup
Schema Pro provides a range of schema types that you can add to your pages/posts. But there is a number of different types of schemas available on Schema.org.
Schema Pro is continuously adding new types to the list so that you can easily add schema to your website. But in case, with Schema Pro, you don’t find the schema type you wish to add, you can opt for custom schema markup and add your custom code.
With custom schema markup option, you can add custom schema in JSON-LD format easily.
Schema Pro provides dedicated settings where you can simply paste custom code and it will be added to target locations. You can add custom schema globally to all target locations or add page-specific schema.
This article will explain how you can add custom markup. But before you add your custom schema markup, test it with the schema testing tool. This will make sure that the custom code you are adding is valid and generates the expected output.
Here is a quick checklist for custom schema code you add –
- Be sure to add custom schema markup in JSON-LD format.
- As the custom schema markup in JSON-LD format, make sure to add it in <script> tag.
- Validate schema markup with the Structured Data Testing Tool or Rich Results Test before adding to the website.
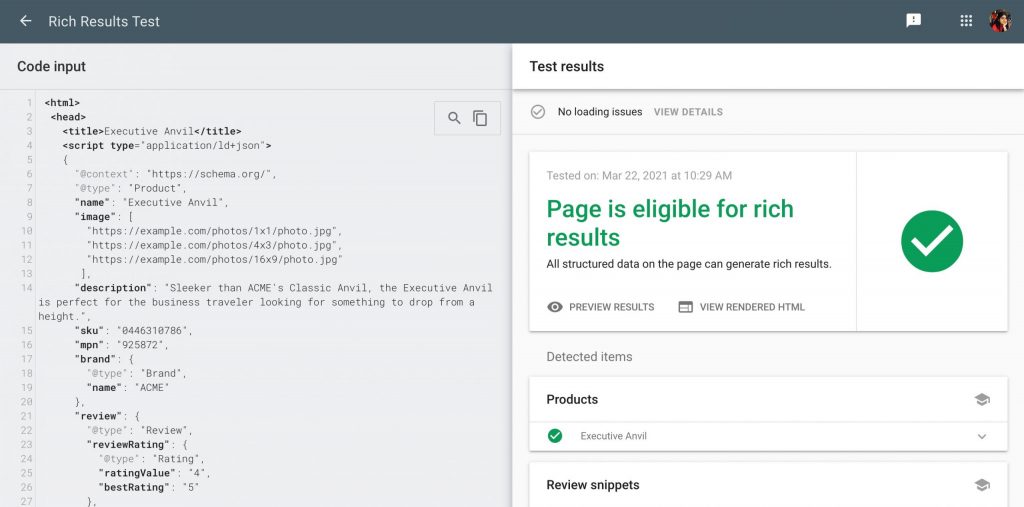
Here is how you can add custom schema markup with Schema Pro –
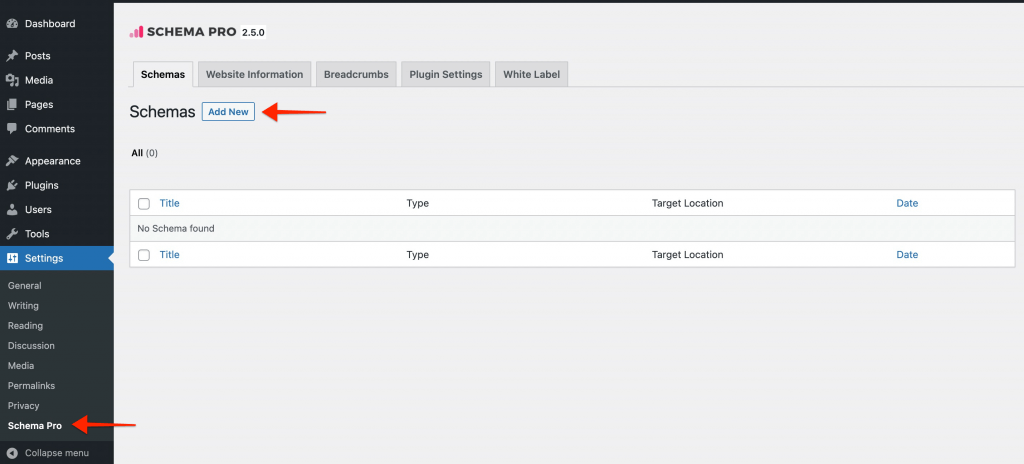
Step 1 – Go to Settings > Schema Pro and click on Add New.
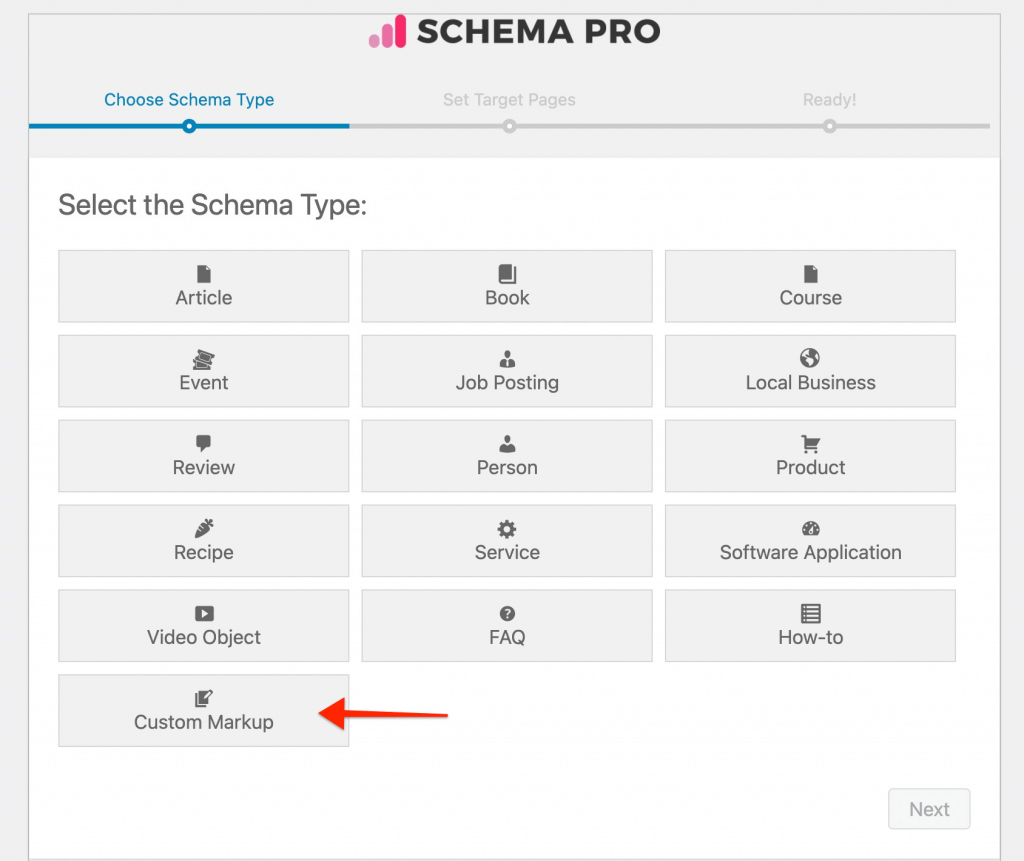
Step 2 – Select Custom Markup and click on next.
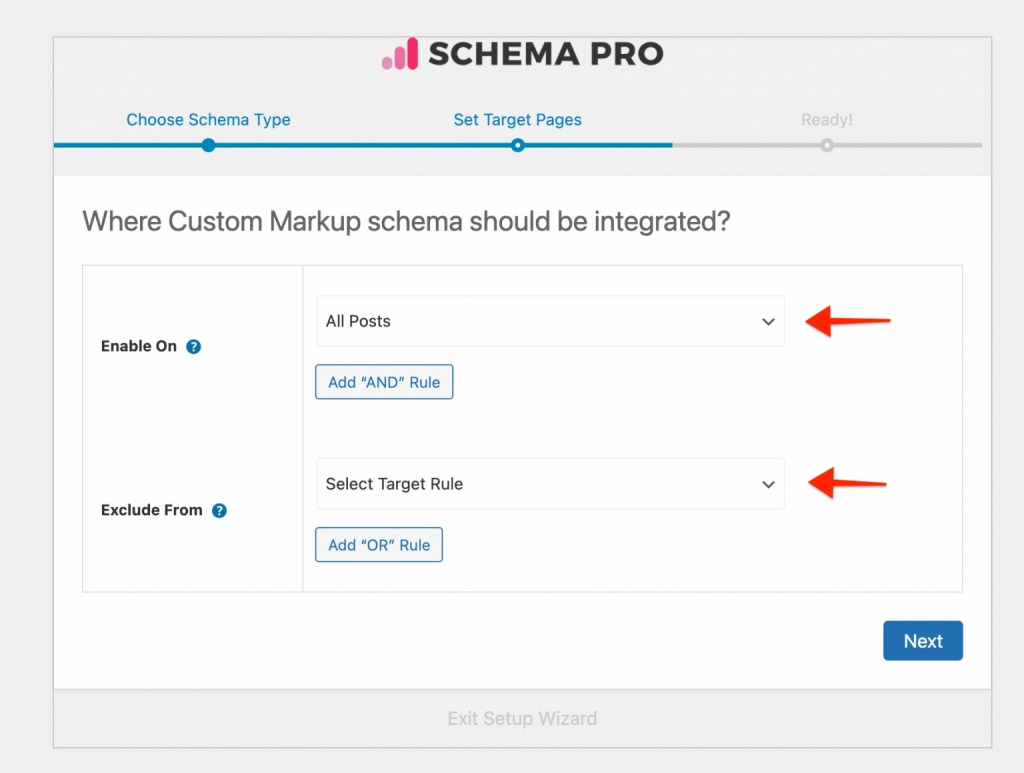
Step 3 – Select target locations to display schema. Choose a location from Enable On option. You can even exclude specific locations with these settings. Once you are done, click on next and complete the setup.
Step 4 – You will be taken to a dedicated settings page for custom markup. Here you can choose to add custom markup globally on selected target location or choose it to add on individual pages.
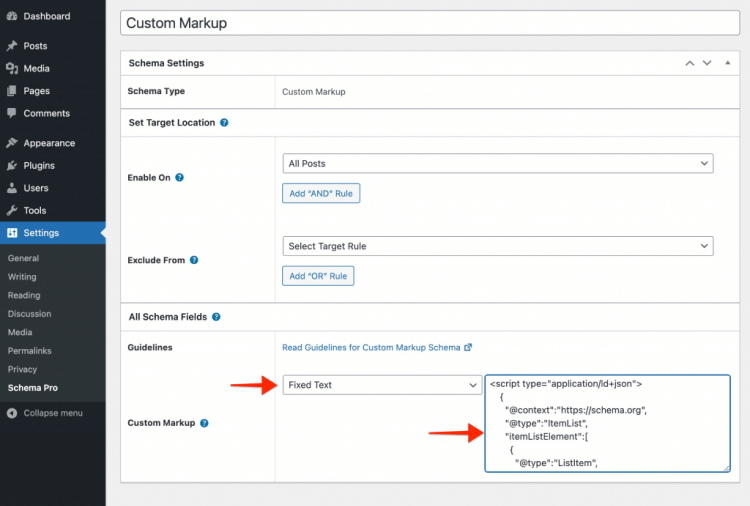
To add it globally – select Custom Markup > Fixed Text. Add your custom schema markup code here.
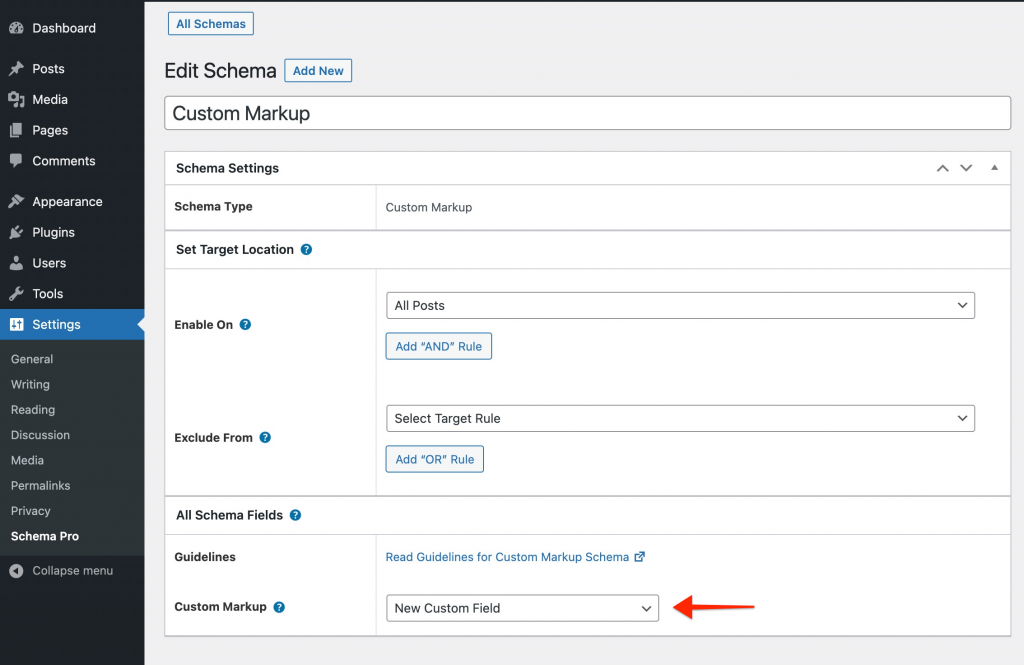
To add it on page-level – select Custom Markup > New Custom Field.
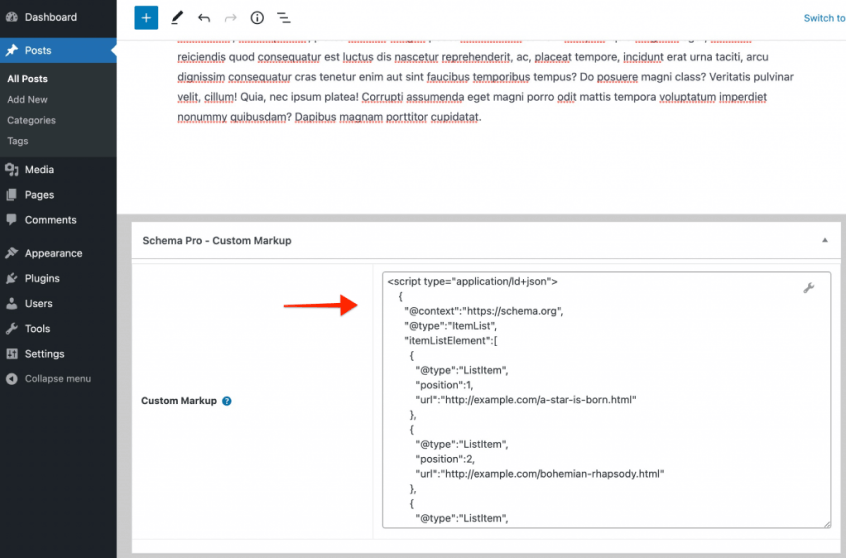
Step 5 – If you choose to display custom markup on page-level, go to the specific page and edit it. Scroll down at the bottom of the page and you will observe a new box with the name Custom Markup. Here you can enter your custom schema code and save the page.
We don't respond to the article feedback, we use it to improve our support content.