- Add an Extra Field for a Schema Type
- Enable/Disable Schema Markup
- Add Ratings Using Shortcode
- Disable a Specific Schema Markup
- Add Schema Markup on Subcategories
- Disable the White Label Settings
- Disable Corporate Contact Schema
- Remove Home List Item from Breadcrumblist Schema
- Remove Shop Item Link on Product Page
- What is the future of Schema Pro now that SureRank has launched?
- How to Use Schema Pro with SureRank
- Test a Schema Snippet
- Mapping Your Schema Fields
- Add an Extra Field for a Schema Type
- How to Use the Schema Pro plugin?
- All-in-one Schema Pro plugin
- Map Required fields with Custom Fields
- Create a Custom Fields
- Target Specific Areas of the Website
- How to Add a Schema markup for an Article on your website?
- Difference Between the Free and Pro Plugin?
- How to map fields with custom fields from third party plugins?
- Accept User Ratings from Users
- Update Schema Pro
- Register Your Copy of Schema Pro
- Organization Type in the Setup Wizard
- Schema Pro Setup Wizard
- Getting Started With Schema Pro
- How To Install Schema Pro Plugin
- Schema Markup for an Event page
- Schema Markup for a Review page
- Schema Markup for a Local Business Page
- Schema Markup for a Service Page
- Schema Markup for a Product Page
- Schema Markup for a Course page
- Schema Markup for a Recipe Page
- Schema Markup for a Person/ About Page
- Schema Markup for a Job Posting Page
- Schema Markup for a Video Object
How To Add an Image License Schema Markup for Your Website Images?
Are you a photographer or have images on your website that are licensed? Want to display license information on the image in Google image? This article will explain how to do so in an easy and quick way.
When we open Google images, some of the images display licensable tags.
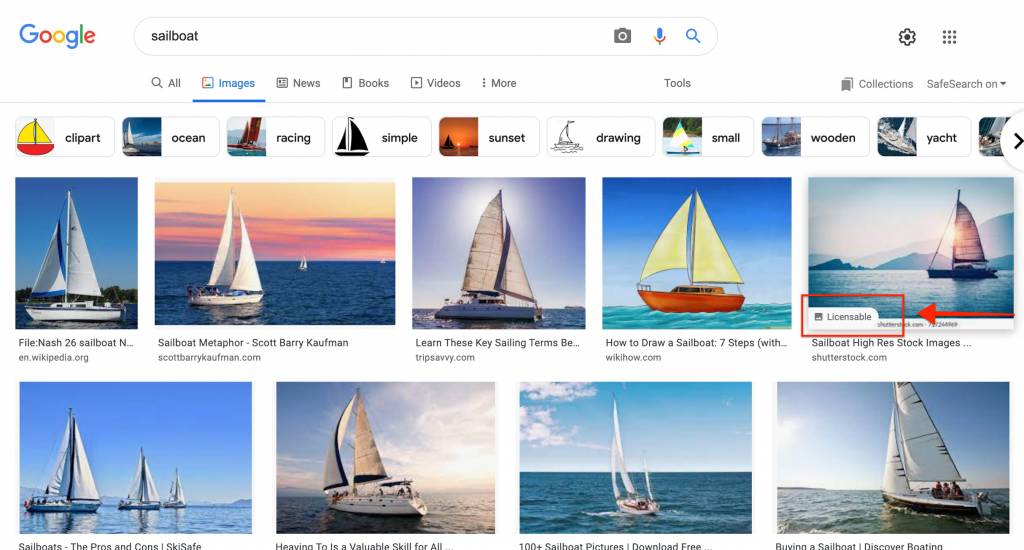
Clicking on these images display more information about the license. This information can be added to your images using the Image License schema.
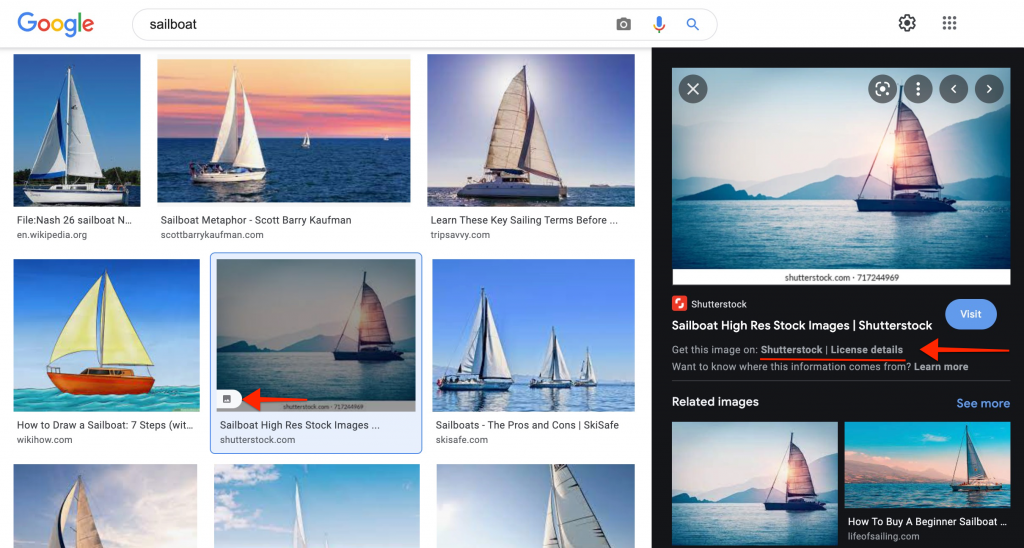
Benefits of adding Image License schema –
- It displays a licensable tag for your pictures in Google images
- It links license page information on your pictures. So when potential customers visit your pictures through Google images they can easily reach your website.
- It reduces the possibility of accidental image theft
- As potential customers reach you easily, it increases the chances of more revenue generation
How To Add Image License Schema?
Schema Pro offers an easy option to add Image License schema to any of your images. Here are steps –
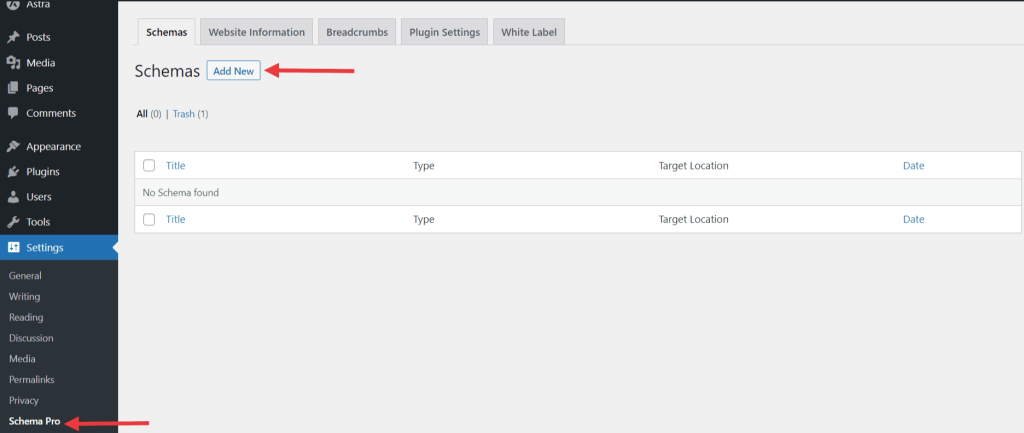
Step 1: Create a new Schema markup by going to the Schemas tab in the Schema Pro interface in the WordPress dashboard. Click on Add New.
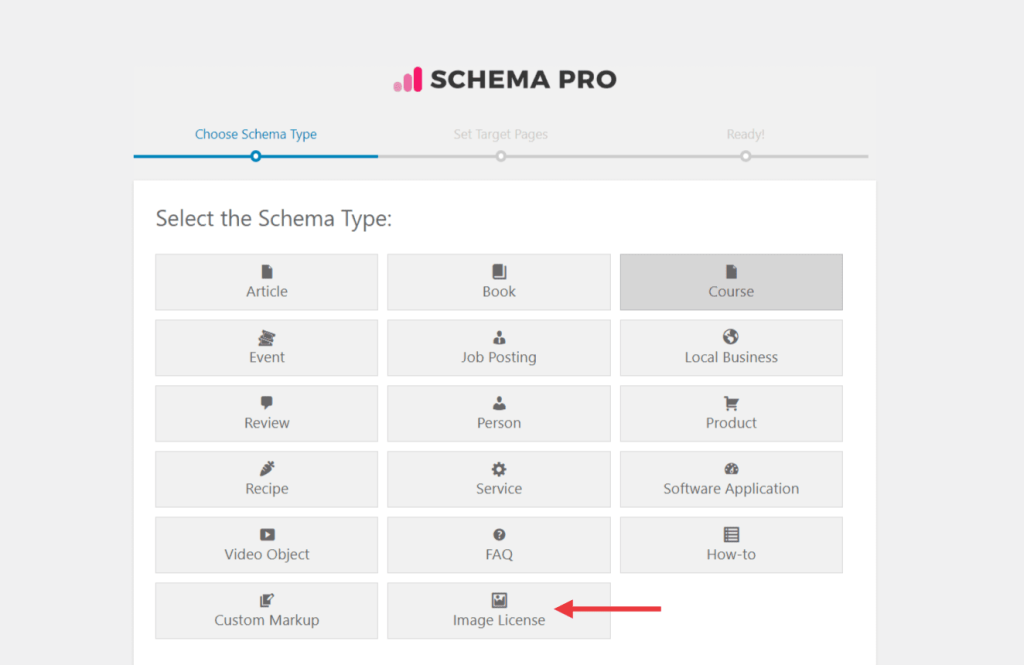
Step 2: Select the type of schema as Image License.
Step 3: Select pages/posts you wish to use this for. You can add display rules and also exclude pages and posts you want to exempt this schema from.
You can refer to an article to know more about how you can target specific pages and posts.
Step 4: You can then complete the setup and proceed to map the required properties with fields that you already have on your website. Mapping is done by default. However, we recommend you check the mapping and make sure your required fields get the right values.
Let’s take a look at the list of Schema Properties you need to fill in for the Image License schema markup.
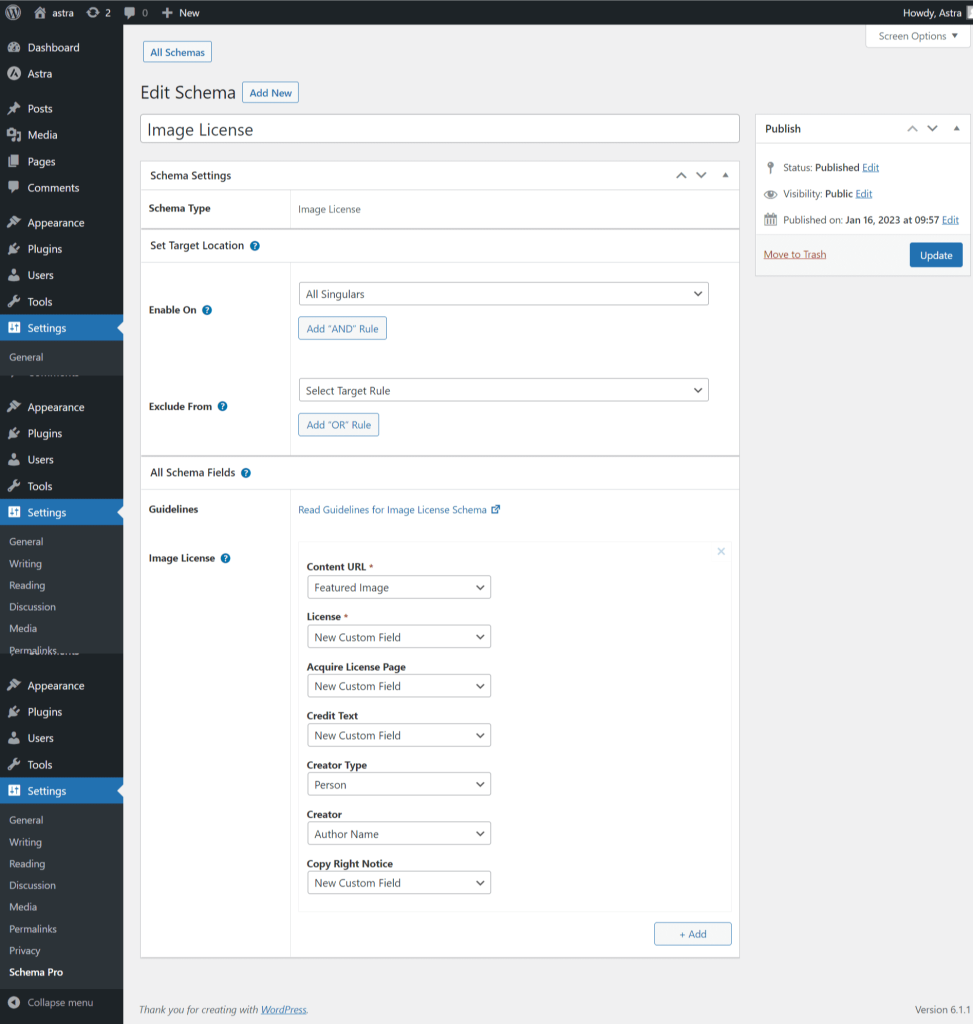
- Content URL (Required field): A URL to your image, the one you need to apply for a license.
- Select Fixed Image to choose an image from the media library.
- Select Image URL to enter image link
- License (Required field): Add a URL to a license information page that explains everything about the license and important terms on using the image. It will appear just below the image and help users to reach your website easily. If users like your image and wish to learn more about the license, the valid license information should be available easily. This can be a terms and conditions page or a dedicated license information page on your website.
- Acquire License Page (Recommended field): A URL to the page that explains step by step process of how one can acquire an image license. This helps users to quickly get a license and start using the image.
- Credit Text: The name of person and/or organization that is credited for the image when it’s published.
- Creator Type: From the dropdown, you can choose the creator type as Organization or Person as the creator of the image. This is usually the photographer, but it may be a company or organization (if appropriate).
- Creator: The creator of the image. This is usually the photographer, but it may be a company or organization (if appropriate).
- Copy Right Notice: The copyright notice for claiming the intellectual property for this photograph. This identifies the current owner of the copyright for the photograph.
Not sure how you can map these fields? You can refer to this article that gives you a clear picture of the fields you see in the drop-down menu.
Publish the schema!
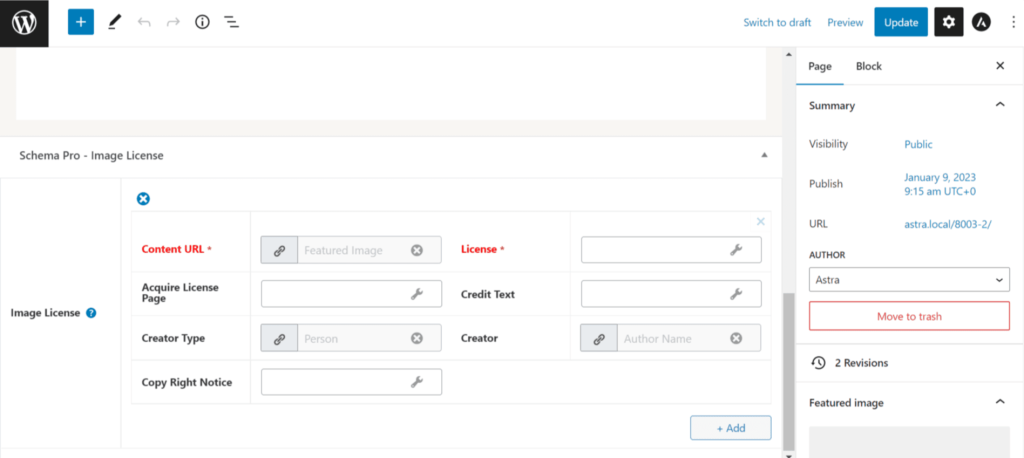
Step 5: Customize schema on pages/posts
Schema Pro offers page-level control for all schema types. The above option serves a global purpose. But if you need to add the image license schema to individual pages or posts, you can do so.
Head over to any existing page or post and click on Edit. Scroll down to see the inclusion of the Image License tab under Schema Pro.
Read more here.
Step 6: Test your schema markup to see that it’s set well. Testing can be done with just a single click. Here is an article that will show you how you can test your schema.
You are all set to see your images displaying licensable tags in Google images.
We don't respond to the article feedback, we use it to improve our support content.