- Add an Extra Field for a Schema Type
- Enable/Disable Schema Markup
- Add Ratings Using Shortcode
- Disable a Specific Schema Markup
- Add Schema Markup on Subcategories
- Disable the White Label Settings
- Disable Corporate Contact Schema
- Remove Home List Item from Breadcrumblist Schema
- Remove Shop Item Link on Product Page
- What is the future of Schema Pro now that SureRank has launched?
- How to Use Schema Pro with SureRank
- Test a Schema Snippet
- Mapping Your Schema Fields
- Add an Extra Field for a Schema Type
- How to Use the Schema Pro plugin?
- All-in-one Schema Pro plugin
- Map Required fields with Custom Fields
- Create a Custom Fields
- Target Specific Areas of the Website
- How to Add a Schema markup for an Article on your website?
- Difference Between the Free and Pro Plugin?
- How to map fields with custom fields from third party plugins?
- Accept User Ratings from Users
- Update Schema Pro
- Register Your Copy of Schema Pro
- Organization Type in the Setup Wizard
- Schema Pro Setup Wizard
- Getting Started With Schema Pro
- How To Install Schema Pro Plugin
- Schema Markup for an Event page
- Schema Markup for a Review page
- Schema Markup for a Local Business Page
- Schema Markup for a Service Page
- Schema Markup for a Product Page
- Schema Markup for a Course page
- Schema Markup for a Recipe Page
- Schema Markup for a Person/ About Page
- Schema Markup for a Job Posting Page
- Schema Markup for a Video Object
Register Your Copy of Schema Pro
Schema Pro offers two different purchase options, the Schema Pro Plugin and the Business Toolkit (with all of Brainstorm Force products.)
After your purchase, you will be sent an email confirmation with links to log in and download your plugins from the store.
Once your plugin is installed you have to license your copy of the plugin to enable the features, get support, and updates for the plugin.
This is how you can register your Schema Pro license key:
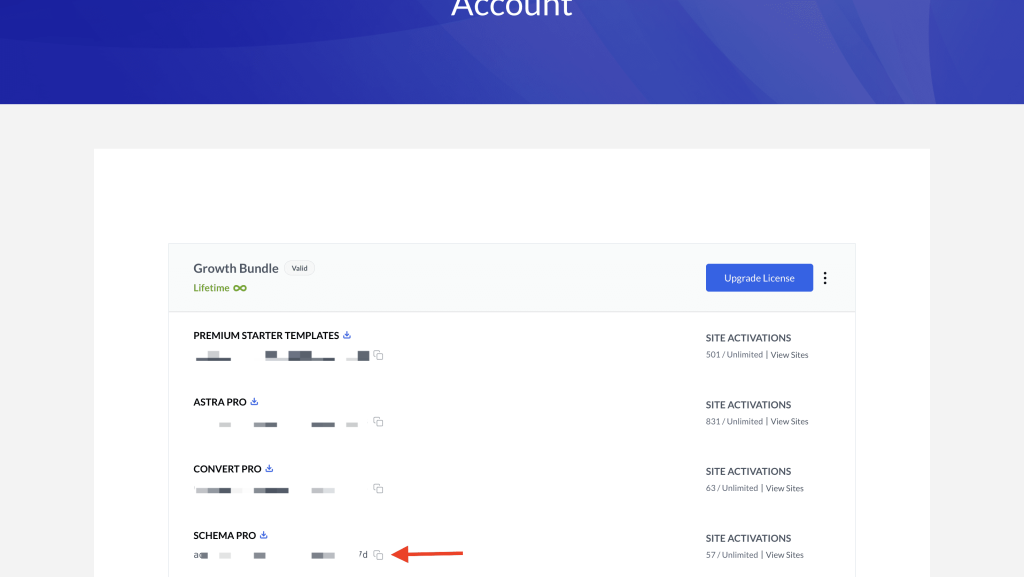
- Get your license key by logging in to your store account and going to Account > Dashboard.

- Copy the license key next to “Schema Pro”.

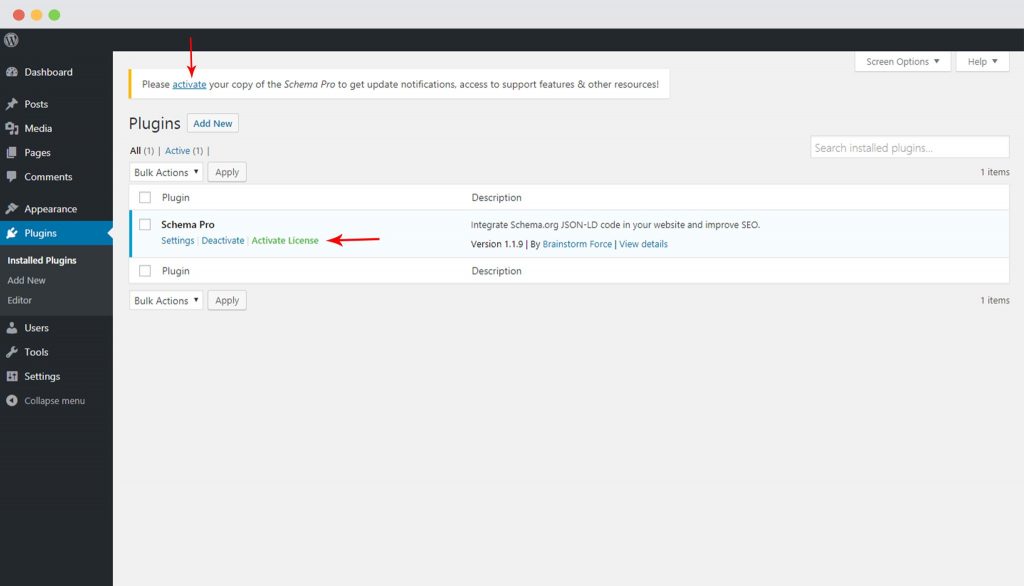
- Once you’ve copied the license, open the plugins page in your WordPress dashboard, and activate the license by clicking on one of the notices highlighted below.

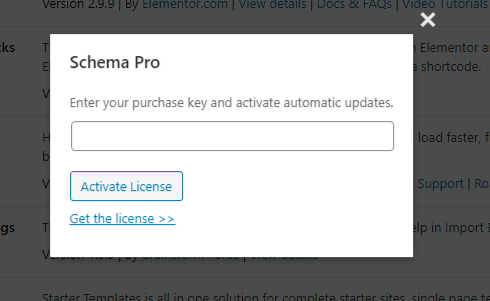
- Enter the purchase key on the input field to activate your license.

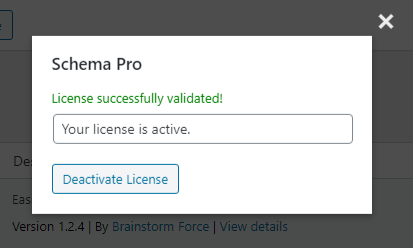
- Once activated, you should get this notification.

That’s it! You’re ready to start adding schema markup to your website. Not sure what to do next? Check out our guides to adding different types of markups.
And if you face any issues, feel free to contact our support team. We’re always here to help.
We don't respond to the article feedback, we use it to improve our support content.