- Add an Extra Field for a Schema Type
- Enable/Disable Schema Markup
- Add Ratings Using Shortcode
- Disable a Specific Schema Markup
- Add Schema Markup on Subcategories
- Disable the White Label Settings
- Disable Corporate Contact Schema
- Remove Home List Item from Breadcrumblist Schema
- Remove Shop Item Link on Product Page
- Test a Schema Snippet
- Mapping Your Schema Fields
- Add an Extra Field for a Schema Type
- How to Use the Schema Pro plugin?
- All-in-one Schema Pro plugin
- Map Required fields with Custom Fields
- Create a Custom Fields
- Target Specific Areas of the Website
- Enable/Disable Schema Markup
- Add Ratings Using Shortcode
- How to Add a Schema markup for an Article on your website?
- Difference Between the Free and Pro Plugin?
- How to map fields with custom fields from third party plugins?
- Accept User Ratings from Users
- Update Schema Pro
- Register Your Copy of Schema Pro
- Organization Type in the Setup Wizard
- Schema Pro Setup Wizard
- Getting Started With Schema Pro
- How To Install Schema Pro Plugin
- Schema Markup for an Event page
- Schema Markup for a Review page
- Schema Markup for a Local Business Page
- Schema Markup for a Service Page
- Schema Markup for a Product Page
- Schema Markup for a Course page
- Schema Markup for a Recipe Page
- Schema Markup for a Person/ About Page
- Schema Markup for a Job Posting Page
- Schema Markup for a Video Object
Update Schema Pro
We are continuously pouring in efforts to improve our products and services. With that said, your Schema Pro subscription comes with the option to receive automatic updates for additional features, and occasional bug-fixes.
Updating your Schema Pro plugin is very simple. We’ve broken them down to the two main ways this can be done.
One-click Auto Update
The easiest and safest way to do it is on the built-in updating feature within the WordPress Dashboard. Here are the steps to do that:
1. Go to your WordPress Dashboard -> Updates.
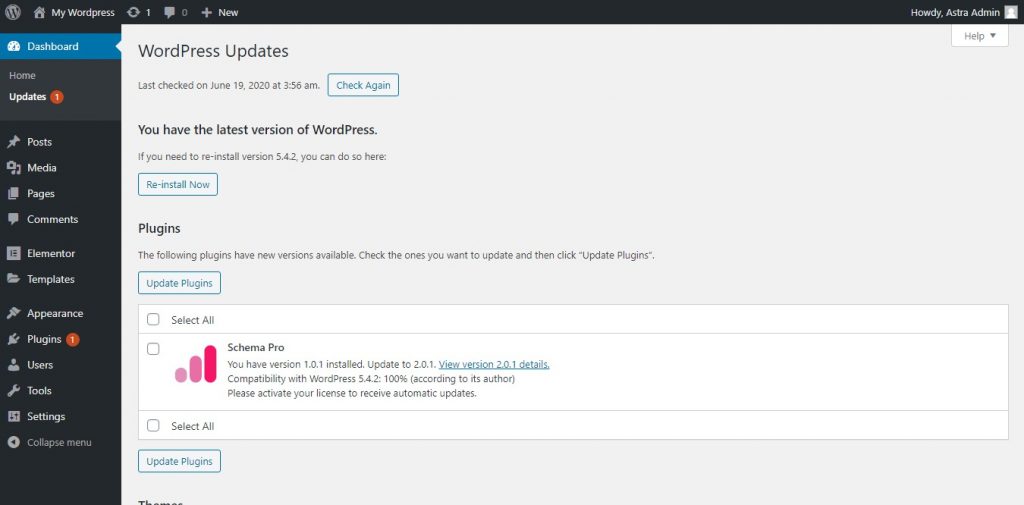
2. If there is an update available, you should be able to see the update notification.
*If you do not see Schema Pro from the list, click on the “Check Again button.
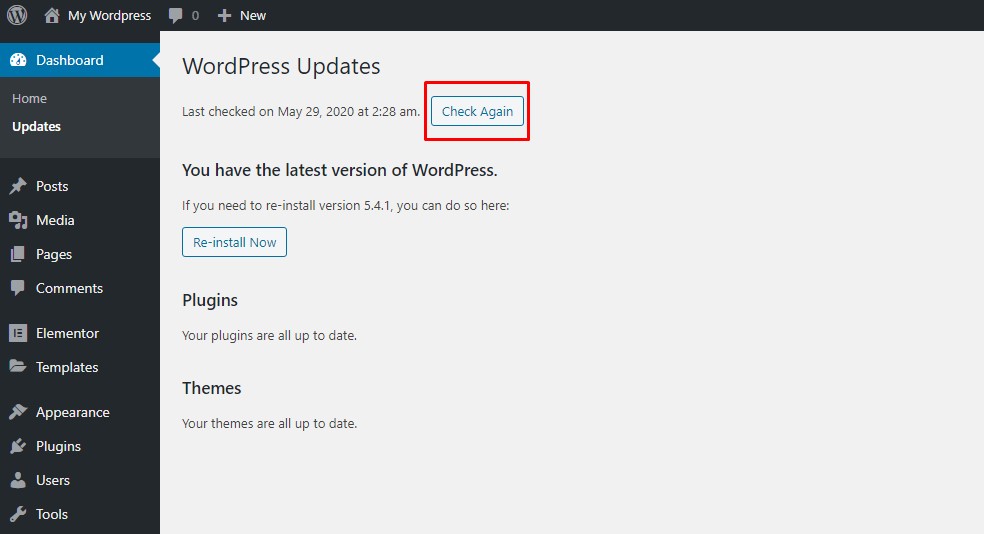
Note: Your copy of Schema Pro should be registered in order to receive one-click updates. To know more about Schema Pro registration, you can refer to the article here.
After the update, you should be all set.
Manual Update
If for any reason you do not want to or unable to update the plugin we do have another option available for you to try- updating the plugin manually. Here’s how to do it:
1. Log in to our store and open the Downloads page.
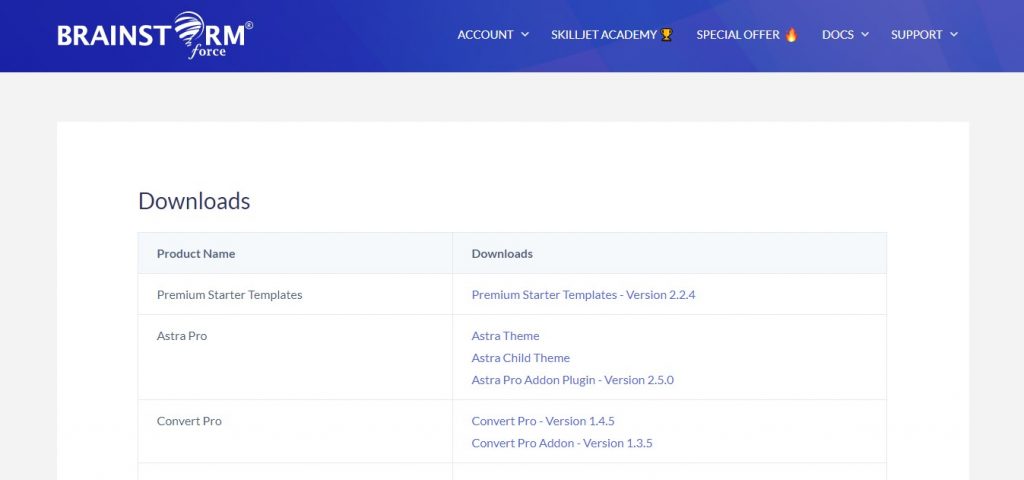
2. Download the latest version of Schema Pro from this page.
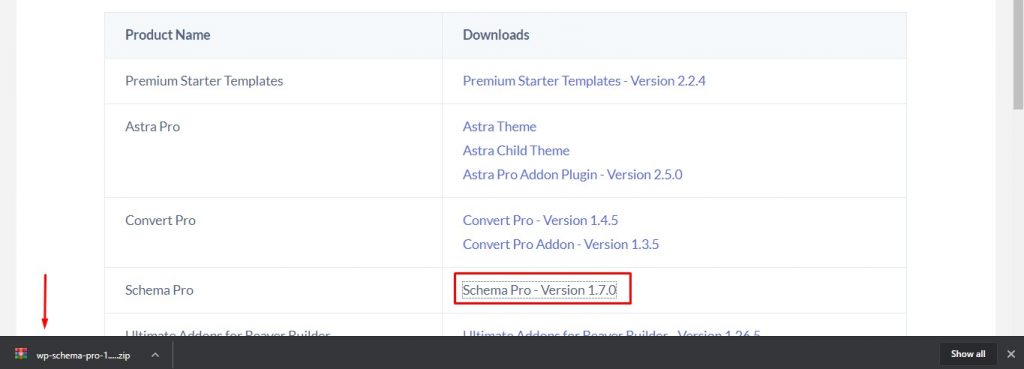
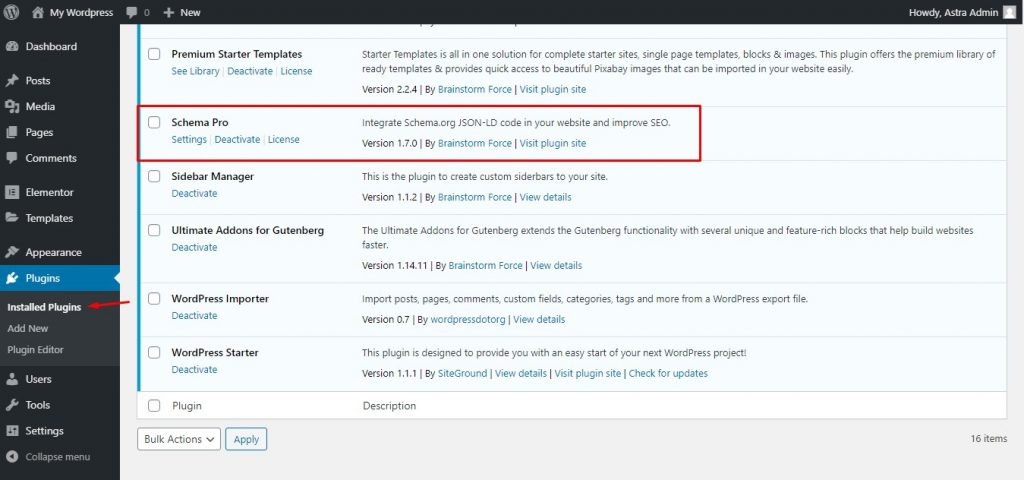
3. Go back to your WordPress dashboard -> Plugins -> Installed Plugins and uninstall the previous version from your website (deactivate first, then delete).
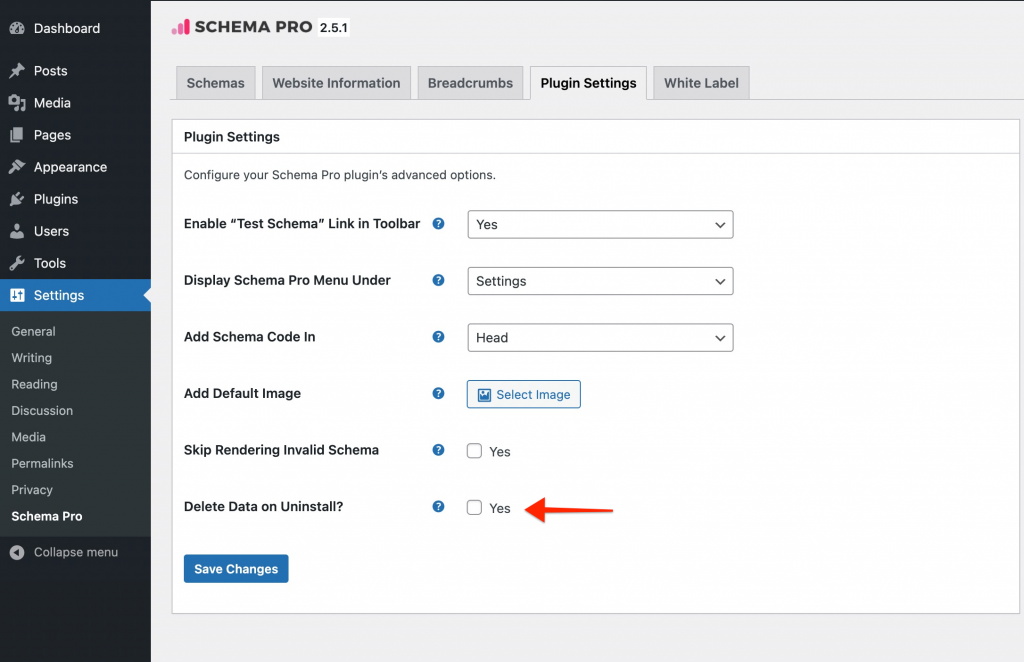
IMPORTANT NOTE: Before deleting the plugin, make sure that the “Delete Data on Uninstall?” setting is unchecked. You can verify this by going to your WordPress Dashboard -> Settings -> Schema Pro -> Plugin Settings
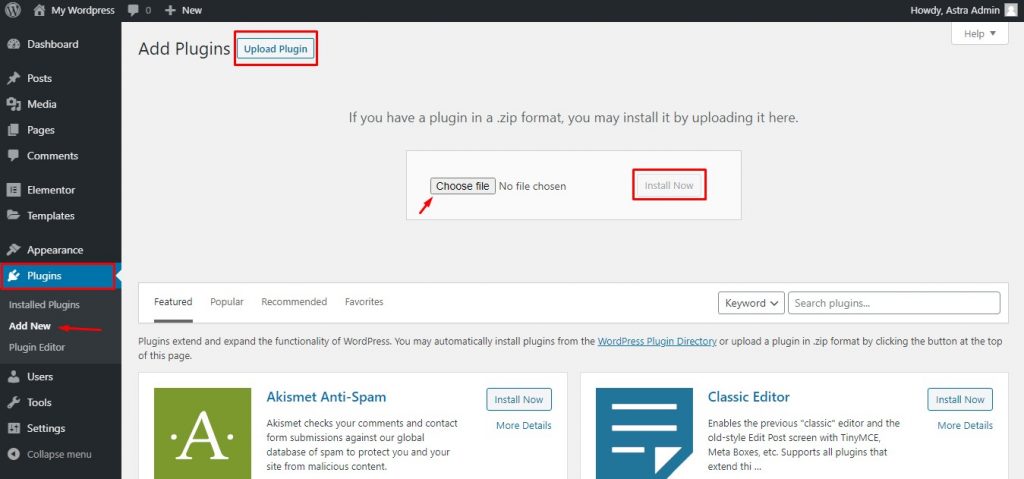
4. Install the latest version that you just downloaded, by clicking on the “Add New” button, “Upload Plugins“, “Choose File” to locate the file, and click “Install Now“.
After activating the updated version of the plugin, you would have to re-enter your license key. Here’s a handy guide on how to do that.
It’s also best practice to double-check all the changes in the newest version of the plugin to make sure you make the most of the plugin.
Click here to see the changelogs.
We don't respond to the article feedback, we use it to improve our support content.